I think I tapped into the mind of Ms. Trunchbull’s favorite baker, Cookie. This has to be the cake Matilda’s homeboy stole. I know Bruce would approve of this recipe. It’s easy. It’s moist and it’s decadent. This will be the ONLY chocolate cake recipe that you will ever need!
Easter in Louisiana is something special. Picture this. Church pews full of pastel colored suits, frilly dresses, and big hats. Kids with blank stares holding a microphone in front of the congregation, because they’ve forgotten the Easter poem their parents made them recite 100 times during the week. Ushers outside during the sermon hiding dyed eggs for the hunt after church. However, all that’s on your mind is the huge pot of Crawfish Bisque with stuffed heads that’s waiting for you in the kitchen back at home. Thank God for Jesus!
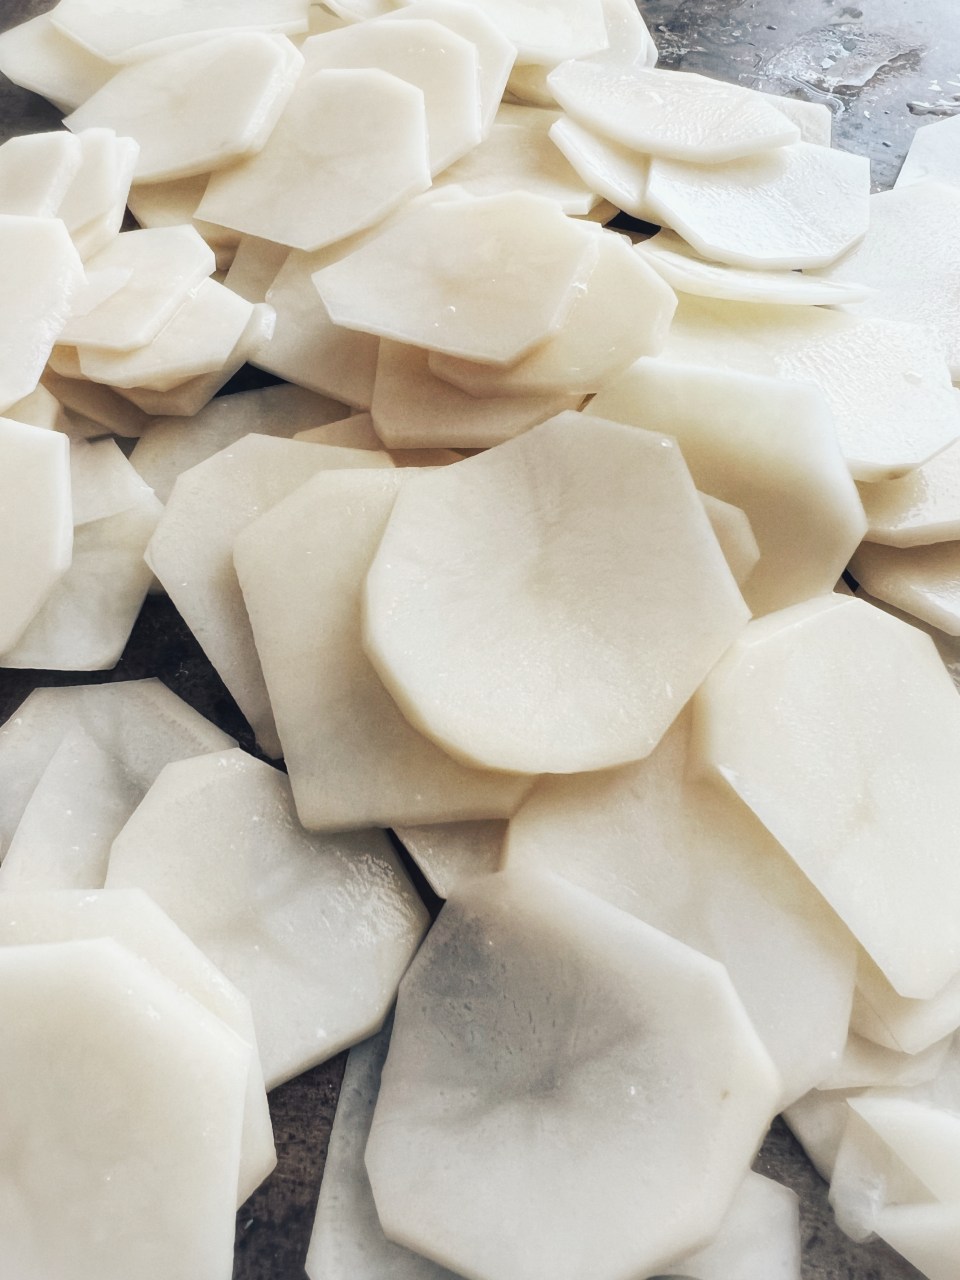
The hardest part of the recipe isn’t the roux. It’s following my Louisiana Crawfish Boil recipe: https://coopcancook.com/louisiana-crawfish-boil-recipe/ the day before and reserving some of the crawfish for this Bisque. Then, you have to peel said crawfish without eating them. Pure torture, I tell ya! Try your best to reserve 4-5 pounds of crawfish from the boil. The flavor of them in this Bisque is unmatched!
What’s that Yellow Stuff??
If you’ve never peeled a crawfish, just watch my tutorial. It’s somewhere on this page. Just keep scrolling. Anyway, you want to have 3 bowls setup. One for the crawfish tail meat. Another for the claws, cartilage from the heads, and other peelings. And lastly, one for the empty crawfish heads. And the yellowish, orange stuff on the crawfish tails? Yeah, it’s kinda like Manna from Heaven. It’s where a lot of flavor resides. Don’t trash it or wipe it off! Blasphemy!
To “gut” the crawfish heads, I just use my finger to lift it out. If you’re afraid to break or crack the heads by doing so, just use a butter knife. Scrape it out and rinse the heads well. Pat them dry, and set aside.
No Waste Gang
What I love most about this dish, aside from the taste, is that nothing goes to waste. We use every part of the crawfish for something! This is my favorite way to make crawfish stock. And it’s incredibly easy! Just dump all of the crawfish peelings into a large stock pot. Then, fill it with water. Bring to a boil, lower the heat to a simmer, and forget it for an hour or so. You don’t need to add anything else if you boiled the crawfish right. All of the flavor from the boil with transfer beautifully into your stock!
Peel all of the crawfish; reserve the heads, peelings, and tail meat in separate bowlsRemove all of the cartilage and claws from the heads and add it to the rest of the peelingsReserve the empty heads and the tail meat. Add the peelings and claws into a large stock pot. Pour in 10-12 cups of water. Bring to a boil. Lower the heat to a simmer. Simmer for about 1 hour. Skim off the foam from the top of the stock then drain the stock into a bowl. Discharge the peelings and claws. Reserve the stock.
Stuffed Up
Now, let’s discuss this divine stuffing! Grind up some of those crawfish tails for this. Traditionally, you just add the tails, breadcrumbs, some veggies, and seasoning. I did all of that AND I folded in in some lump crabmeat! Seafood overload! This is completely optional. But, I highly recommend that you try it! I use a piping bag to stuff the heads. Easy, breezy.
Preheat the oven to 350°FRinse the empty crawfish heads well; pat dry and set aside. In a food processor, finely chop the onion, bell pepper, celery, garlic, and green onions. Melt the butter in a pan and sauté the veggie mix for 5 minutes. Remove from the heat and allow to cool at room temp. Add the 2 lbs of crawfish tails into the food processor and pulse until the tails are finely chopped. In a mixing bowl, combine the veggie/butter mix, finely chopped crawfish tails, and breadcrumbs. Mix well. Taste and add Cajun or Creole seasoning as needed. Stir in the beaten egg. Then, gently fold in the crabmeat. Add the stuffing into a piping bag and fill each empty crawfish heads with the stuffing. Place the stuffed heads on a parchment paper or aluminum foil lined baking sheet. Bake for 30 minutes.
The Roux
Don’t burn it. That’s all I’ve got to say. If you use a metal whisk to whisk that flour in, you better switch it out for a wooden spoon immediately. That metal will heat up and burn the roux. Wooden utensils are safer for rouxs. The good part is that we don’t need a dark, gumbo roux. So, we won’t be stirring for too long. Just until the roux is a nice, peanut butter color. Speaking of color, some prefer a red bisque. I like mine brown. The color of a good étouffée. But, if redder is what you’re used to, just add more tomato paste than I did. You can also add tomato sauce. Just don’t tell anyone it’s my recipe if you do.
Will the Stuffing Fall Out of the Heads?
Not if you don’t stir it like a bat out of hell! Just pack it in well, bake it, and all will be well. You’ll have to take it out of the heads to eat it anyway!
Louisiana’s pot of gold! This stuff is so good! Imagine using the crawfish from a boil to make a silky, flavor packed stock. Then, add the stock to a perfect roux. Yes there’s more…just read on.
Prep Time2hours
Cook Time2hours
Total Time4hours
Servings7people
Ingredients
Stock:
4-5lbsboiled crawfish
10cupswater
Stuffed Crawfish Heads:
50-60crawfish heads
1stick salted butter
1 1/2cupbreadcrumbs
1lbpeeled crawfish tails
1onion
1bell pepper
2celery stalks
1TBSminced garlic
1/4cupchopped green onions
Cajun or Creole seasoning to taste
1beaten egg
1lblump crabmeatoptional
Bisque:
1/2cupvegetable oil
2/3cupall purpose flour
1onion
1bell pepper
2celery stalks
1TBSminced garlic
1/3cupchopped green onions
1/4cuptomato paste
8cupscrawfish stock*
1tsponion powder
1tspgarlic powder
Cajun or Creole seasoning to taste
1TBSliquid crab and shrimp boil concentrate
Remaining crawfish tails
Fresh parsley to garnish
Warmwhite rice for serving
Instructions
Stock:
Peel all of the crawfish; reserve the heads, peelings, and tail meat in separate bowls
Remove all of the cartilage and claws from the heads and add it to the rest of the peelings
Reserve the empty heads and the tail meat.
Add the peelings and claws into a large stock pot.
Pour in 10-12 cups of water.
Bring to a boil.
Lower the heat to a simmer.
Simmer for about 1 hour.
Skim off the foam from the top of the stock then drain the stock into a bowl.
Discharge the peelings and claws.
Reserve the stock.
Stuffed Crawfish Heads:
Preheat the oven to 350°F
Rinse the empty crawfish heads well; pat dry and set aside.
In a food processor, finely chop the onion, bell pepper, celery, garlic, and green onions.
Melt the butter in a pan and sauté the veggie mix for 5 minutes.
Remove from the heat and allow to cool at room temp.
Add the 2 lbs of crawfish tails into the food processor and pulse until the tails are finely chopped.
In a mixing bowl, combine the veggie/butter mix, finely chopped crawfish tails, and breadcrumbs.
Mix well.
Taste and add Cajun or Creole seasoning as needed.
Stir in the beaten egg.
Then, gently fold in the crabmeat.
Add the stuffing into a piping bag and fill each empty crawfish heads with the stuffing.
Place the stuffed heads on a parchment paper or aluminum foil lined baking sheet.
Bake for 30 minutes.
Bisque:
Add the onion, bell pepper, celery, garlic, and green onions into a food processor and blend until finely chopped
Heat the oil in a dutch oven or heavy bottom stock pot.
When the oil is hot, whisk in the flour to make the roux. (Do NOT walk away! The roux will burn if the heat is too hot and you do not stir constantly.)
Continue stirring until the roux is the color of peanut butter.
Add in the finely chopped veggies.
Sauté for 5 minutes.
Stir in the tomato paste until well combined.
Pour in the reserved crawfish stock, stir, and bring to a simmer
Toss the remaining crawfish tails in the liquid crab boil
Then, add the crawfish tails into the pot.
Stir in the onion and garlic powders
Reduce the heat to LOW and simmer, uncovered for 20 mins.
Add in the baked, stuffed crawfish heads.
Continue to simmer for 10-20 more minutes.
Taste and adjust seasoning as needed.
Serve over warm white rice and garnish with fresh, chopped green onions.
Spicy, tender, and full of flavorful! Louisianans love a good boil! Try this recipe and you’ll see why!
Prep Time10minutes
Cook Time5hours
Total Time5hours10minutes
Servings5people
Ingredients
4-5lbsturkey necks
2bell peppersroughly chopped
1large onionroughly chopped
1whole celery stalkchopped
2clovesgarlicpeeled
1cupshrimp and crab boil dry seasoning
1/4cupchicken bouillon powder
1-2TBSliquid crab boil concentrateomit for milder taste
6cupswater
2lemons for washing
1-2tspaccent seasoningyes, it’s MSG, so it’s *OPTIONAL. Don’t start crying to me about it. I don’t have time.
**corn and potatoes
Instructions
Rinse the turkey necks well with water and juice from the lemons
Cut off excess fat and discharge
In a large bowl, mix the dry seasoning, bouillon powder, liquid crab boil, water, and accent* well.
CROCKPOT:
Place turkey necks and all veggies into a 7qt or larger slow cooker.
Pour the water and seasoning mixture on top.
Cover with the lid and cook on HIGH for 4 hours or LOW for 7-8 hours or until meat is tender.
STOVETOP:
Pour the water and seasoning mixture into a large stockpot.
Add in the veggies and bring to a boil for 10 mins.
Add in the turkey necks.
Reduce heat to a medium heat setting
Cover with a lid, but leave a slight crack.
Cook for 2 hours or until meat is tender.
You may need to add more water throughout the cooking time.
Drain.
Enjoy!
Recipe Notes
**corn and potatoes may be added during the last 2 hours of cooking time in the Crock-Pot. Check the corn every 30 minutes and remove when done to avoid overcooking. For the stovetop method, add the corn and potatoes into the boiling liquid after removing the turkey necks and cook until potatoes are tender.
The recipe was inspired by the scalloped potatoes I had in NYC. Took my friend to Ocean Prime in Manhattan near the Rockefeller Center. Pretty posh place. I pulled out my fancy shoes that I can barely walk in for the occasion. We had so much fun (and so much booze) that I ended the night barefoot in the Uber. That’s a good story for a later date. What are we talking about again? Potatoes! Scalloped ones! Yeah, this recipe will be your new favorite side dish. If not, your taste SUCKS!
Joll-lah-pah-no-knees
Jalapeños are the not so secret ingredient. They add a nice, subtle kick. I like to leave a few seeds in for heat. But, that part’s up to you. Fresh jalapeños are hotter. But, if you like more spicy, sub a Serrano pepper instead, you daredevil!
They Should be Sisters, Not Cousins…No, Twins Even!
Slice the potatoes evenly. Get a mandolin if you’re hand is as inconsistent as mine are. Don’t slice them too thin, though. It will make them too mushy during the parboiling stage. We can’t skip that. Two reasons: one, it shortens our baking time. And, two, it gives us the chance to salt the pots. I hate unseasoned potatoes. Scalloped potatoes shouldn’t just rely on the sauce for flavor, ya know? So, yeah, don’t be shy with the salted water. And do not over boil the potatoes! Run Me My Coins!Philadelphia cream cheese owes me a damn sponsorship, cause what the hell?? I really put this in almost everything I make. Why is cream cheese so good? I use their garlic and herb blend, because I get to skip peeling garlic. Work smarter, people. Not harder. If you can find the garlic and herb, tough! Make your own. How? Are garlic and herbs. Duh! Or just buy the one with chives and green onions or something. Just make sure you add cream cheese.
Cheese, Please.
As for cheese, I’ll always choose Monterey Jack. And a lot of it! Feel free to add other cheeses if you’d like. Fontina, Colby Jack, aged Cheddar, and Gruyere are good as hell in this stuff! Layer everything evenly. It’ll help when you’re chowing down. Golden goodness! Look at that! When your fork submerges into this excellently crafted side dish and those pockets of bubbly, gooey goodness spews out….remember, Coop can damn sure cook! I love you, k?
Your new favorite side dish has arrived! Cheesy and creamy slices of potatoes with just the right kick of spice! You’ll look for any excuse to make this! Trust me!
Prep Time10minutes
Cook Time50minutes
Servings7people
Ingredients
2poundsRusset or Yukon Gold potatoes
4TBSbutter
2TBSdiced jalapeños
4TBSall purpose flour
1cupheavy whipping cream
2cupswhole milk
4ozgarlic & herb cream cheese
1TBSchicken bouillon powder
1tsponion powder
Salt and pepper to taste
1poundMonterey Jack cheeseshredded
Finely chopped chives
Instructions
Preheat oven to 375°F
Peel and thinly slice the potatoes
Parboil them for no more than 3 mins in boiling, salted water.
Drain and set aside.
Melt the butter in a saucepan
Add in the jalapeños and sauté for 1 minute.
Whisk in the flour until it’s no longer visible; about 1 minute.
Pour in the heavy cream and milk while whisking.
Stir in the cream cheese.
Continue to whisk until smooth and bubbly.
Add in the chicken bouillon powder and onion powder.
Salt and pepper to taste.
Remove from heat.
Spray a deep, casserole dish with nonstick cooking spray
Layer half of the potatoes in the bottom if the dish
Evenly pour on the sauce
Then, sprinkle half of the cheese on top.
Repeat this layering process ending with the shredded cheese on top.
Bake, uncovered, for 35-40 minutes, or until potatoes are cooked and cheese is bubbly.
Remove from the oven and allow it to rest for 20 mins until it sets.
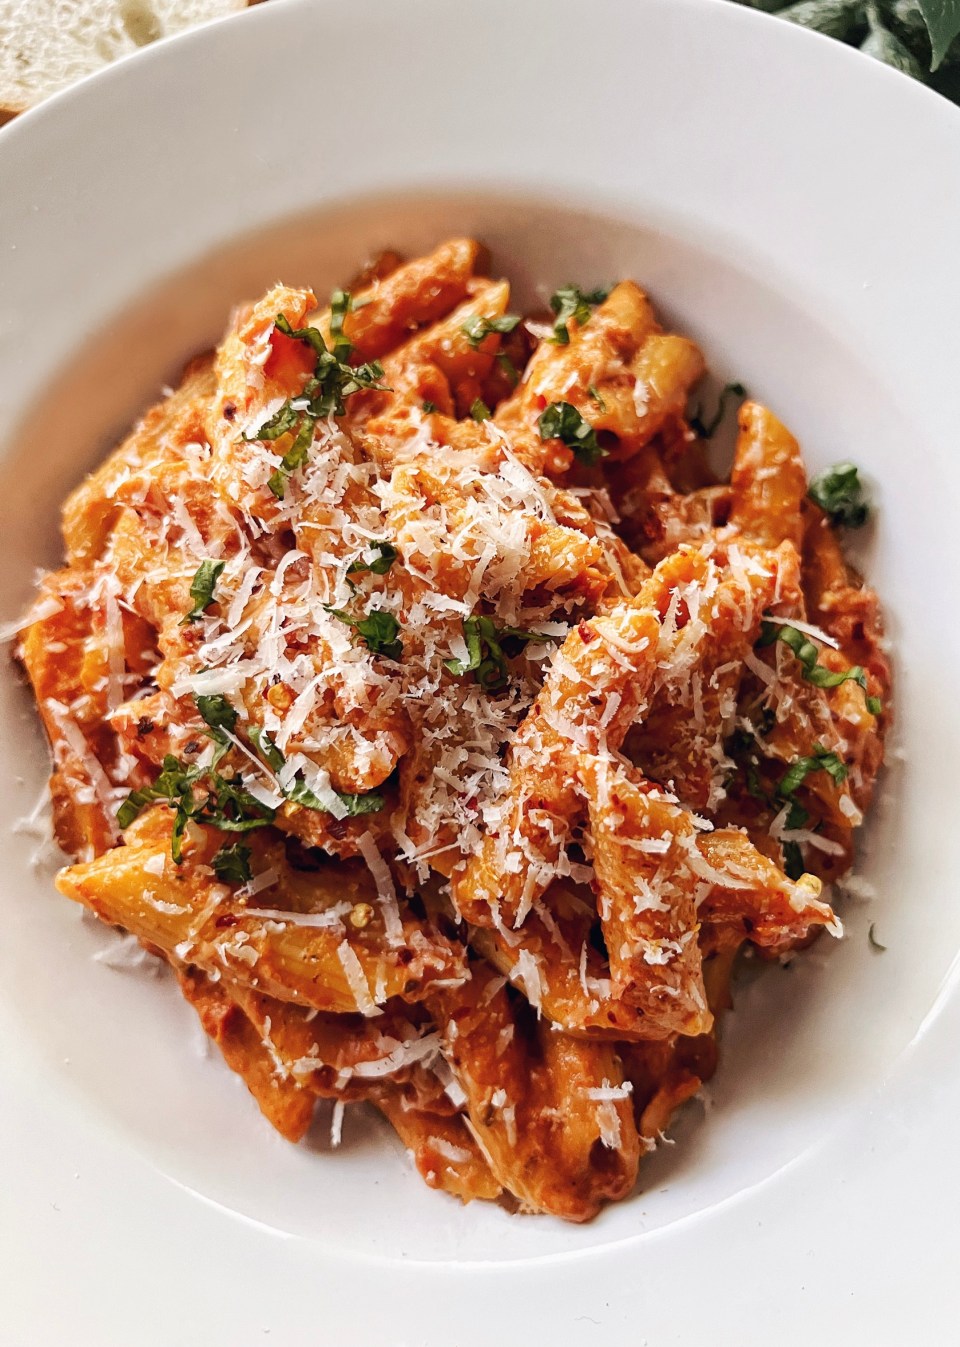
In 2021, I became a traveling foodie. I disguised it as a “photographer”, but whatever. It is what it is. Everywhere I travel, I research the best restaurants in the area before the hotels. Because, you know…priorities. I had a shoot in Chicago earlier this month. My model/friend recommended that we try Tavern on the Rush in the city’s famed “Viagra Triangle”. It’s an intimate spot with a quaint, yet swank vibe. Warm, accommodating staff and extra boozy signature drinks. So, naturally I wanted to move in permanently. Why in the hell is this turning into a review? Long story longer, our waitress recommended that I’d try their creamy, tomatoey, wine based pasta. Best pasta sauce of my damn life!! So, I recreated it. Duh! Keep scrolling.
Don’t Burn Yo Damn House Down!
So, yeah. There’s alcohol in this recipe. No, it will not get your kids drunk. But, it will start a flame that could claim the lives of your eyebrows if you’re not careful. TAKE THE PAN AWAY FROM THE STOVE BEFORE ADDING THE VODKA. I mean it! Don’t watch my tutorial and think you’re about that life. I barely am. Turn the heat off, remove the pan from the stove and THEN stir in the vodka. Place the pan back on the stove and slowly bring it back to a low simmer. Cook until the alcohol reduces and the firefighters on duty can enjoy a peaceful evening. Amen.
Dried herbs go in first, fresh go in last. Remember this!
Don’t be a Cheapskate
If you want restaurant quality food, get quality ingredients. Don’t break the bank either. Get what you can afford. But, if you can splurge for once, do that sh*t! Especially, when it comes to the cheese! Fresh Parmesan Reggiano will change your pasta loving life! Oh! And use a good quality vodka. Something you would want to drink.
And What Else?
I’m trying to figure out what else to tell you about this pasta. The longer my body is on the page, the more dinero in my pocketbook. You feel me? I don’t want to type all of this as much as you just wanted to click a button and get a recipe. That’s why I put that Jump to Recipe button up top. You’re welcome. Get me paid, I get you fed. But, yeah. Add any protein you’d like to this pasta. I throw some chicken breast in the air fryer and get busy! Shrimp is flames in this stuff, too! I know you’ll love it. If you read all of this, I love the entire hell out of you.
A simple recipe for a restaurant quality spicy, creamy vodka sauce! Crushed red pepper flakes and fresh basil add all of the flavor for this Italian favorite!
Prep Time5minutes
Cook Time1hour
Total Time1hour5minutes
Servings4people
Ingredients
16ozpenne pasta
1-2TBSolive oil
1TBSunsalted butter
1/3cupdiced onions
1TBSminced garlic
1TBScrushed red pepper flakes
1tsporegano or Italian seasoning
1tsponion powder
1tspgarlic powder
1/2cupvodka
28ozcan crushed tomatoes
3/4cupheavy cream
1cupfreshly grated Parmesan Reggiano
3-4leavesof torn basil
Salt and pepper to taste
Chiffonade basil for garnish
Shredded fontina cheeseoptional
Instructions
Heat olive oil in a pan on medium heat
Add the butter
As the butter melts, stir in the onions
Sauté for 5 mins or until onions start to brown lightly
Add the garlic; sauté for 30 secs. Do NOT burn the garlic! I mean it!
Add the crushed red pepper flakes, oregano/Italian seasoning, onion and garlic powders.
Stir well
IMPORTANT: Turn off the heat and remove the pan from the stove before adding in the vodka.
Stir in the vodka well.
Then, return the pan to the stove and heat the pan on low. Be very careful of flames!
Bring it to a low simmer and stir until the vodka reduces; about 2 minutes.
Pour in the crushed tomatoes
Salt and pepper to taste
Turn the heat to low and cover the pan with a lid. Be sure to leave a slight crack in the lid.
Simmer for 30 minutes.
Stir in the heavy cream.
Taste and adjust seasoning as needed.
Cover and continue to simmer on low until the penne is ready.
Bring a pot of salted water to a rolling boil.
Add the penne pasta and cook al dente according to package instructions.
Drain the pasta, but reserve some of the pasta water to add to the sauce later. (Optional, I don’t. But, yeah.)
Fold the pasta into the sauce.
Add the parmesan reggiano cheese and the torn basil.
Stir well.
Serve with more chiffonade basil, fontina cheese, and or crushed red pepper flakes if desired.
I’ll be honest. I was hesitant on sharing this recipe, because I’m not a fan of pecans. Especially in a pie. But, I’m a dang food blogger! I can’t just share things I enjoy. If that were the case, I’d just have you eating Lucky Charms. I love them! Anyway, I stopped being selfish. Here’s the Best Pecan Pie recipe on Beyonce’s internet!
Caramel Dream
This filling is so delectable! I will say, Pecan Pie is one of the easiest pies to make. I didn’t even need my electric mixer! And this decadent, rich filling is magical. I use a mixture of light brown sugar and granulated sugar. In the past, I’ve had overly sweet Pecan Pie. To the point that it makes your teeth hurt. I definitely wanted to avoid that in my recipe. I feel that this is the ideal balance of sweetness! The dark corn syrup delicately adds to the mixture of sweet and silky.
Crusty!
I don’t think I will EVER make a decent looking pie crust. I can not crimp the edges properly. Probably because I have these nails. The nails aren’t going anywhere. So, ugly crust it is! You can use the pie crust from the grocery store. Or my homemade recipe. It’s here on the site.https://coopcancook.com/pie-crust/ I don’t pre-bake the crust. I don’t think it’s necessary here. The crust bakes along with the filling beautifully.
Bake Ahead!
I highly recommend baking this pie one day ahead of the date you plan to serve it! Those flavors wed overnight. And the honeymoon is phenomenal. I went too far. Sorry. Just make it ahead and thank me NOW.
I’m quite embarrassed at how long it took me to fall in love with cranberry sauce. I remember grimacing at that cylindrical mold my mom placed amongst our Thanksgiving spread. For the life of me, I just couldn’t understand why my family liked the stuff. I was well into my 20’s when I finally decided to give the stuff a chance. I visited a restaurant that boasted its “homemade cranberry sauce”. Yeah, okay. Long story longer, I loaded my spoon up with dressing and quickly dipped it into this infamous sauce. Yep. Hooked. And now I’ll get you hooked on my HOMEMADE cranberry sauce recipe!
Why do cranberries have to look so good? The color alone rams me into the holiday spirit! If this is your first time making cranberry sauce, prepare to be amazed. I never imagined it being this easy! Back to the berries. Rinse them well. They may be some bad ones in bunch. So, be sure to investigate, scoop them out, and trash them. Nothing like a mouthful of rotten berry taste. Don’t do that.
Suga, Suga
Not much to see here. I don’t want overly sweet sauce with my turkey. You need to preserve a little bit of that cranberry tang to balance out the flavor. I use mainly granulated sugar. But, I can’t help but to drop a little brown sugar on there. You know it’s worth it.
SWEETS NEED SALT! Can’t stress this point enough! Omitting the salt leaves a void in the taste. Have you ever eaten a dessert and thought, “It’s good. But, something is missing.” It’s the damn salt! Salted butter exists for a reason, folks. Don’t be afraid to add a pinch of salt to your sweets. That’s why your tastes buds cry tears of joy when a drop of syrup from your pancakes falls on a piece of your bacon. Am I right?
Water or Juice?
Now, what do you think? I’m choosing juice every time! Cranberry sauce is so adventurous. You can add pretty much any flavored juice to it and it’s like, “Yeah. I’m with it!” Love that for it. Pineapple juice makes all things tastier. It’s my favorite, so I’ll always choose it first. You’ll be glad I did when you try this recipe.
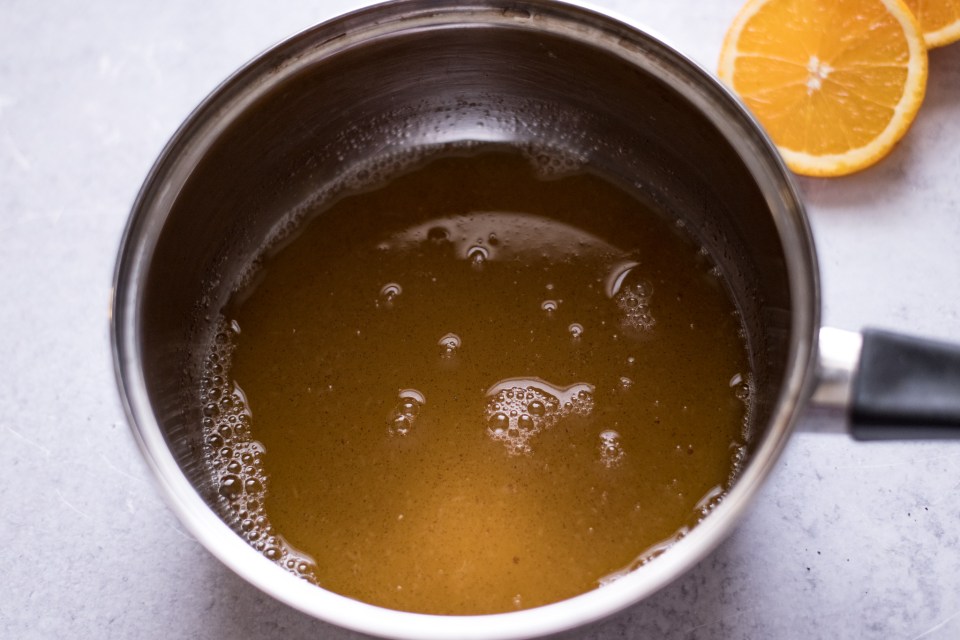
However, oranges are besties with cranberries. They’re so compatible. They just get each other, you know? Make sure you do the squeezing! There’s nothing like fresh OJ! I like to add orange zest to it as well. My family doesn’t favor it, so I just add it to my portion before serving. If your family has better taste than mine, include the zest during the cooking portion of this recipe.
Make it Ahead
This is one dish you can prepare one week before serving and forget about it. Chill it well before serving. After cooking, make sure it cools completely before transferring it into a container and popping it into the fridge.
The perfect mix of sweet and tart to complement your holiday dressing, stuffing, and turkey. Fresh fruit and bright flavors combine for the ideal cranberry sauce!
Prep Time2minutes
Cook Time10minutes
Total Time12minutes
Ingredients
12ouncesfresh cranberries
1cupgranulated sugar
1TBSbrown sugar
1tspcinnamon
1/4tspsalt
1/2cupfreshly squeezed orange juice
1/2cuppineapple juice
Optional:
1tspbourbon
Orange zest
Instructions
Rinse and drain the cranberries
Discard any damaged or rotten berries
In a saucepan, whisk the sugar, cinnamon, salt, and juices together well.
Bring to a boil while stirring
Add the cranberries
Return to a boil
Lower the heat
Simmer for 10 mins; stir occasionally
Remove from the heat
Optional: stir in the bourbon and orange zest
Allow sauce to cool at room temperature
Refrigerator for at least 4 hours before serving
Enjoy!
Recipe Notes
Notes:
Sauce can be refrigerated for up to one week in an air tight container.
My family will always choose Spaghetti and Cheese over Macaroni and Cheese. It’s literally a no brainer in my household. I grew up having spaghetti instead of mac and cheese as a side dish. Very rarely would my mom or aunts use elbow macaroni. We still refer to the spaghetti and cheese as “mac and cheese”. I know. Makes no sense, right? Just trust me and this recipe.
I use thin spaghetti. I’ve never enjoyed the regular sized spaghetti. Not quite sure why. But, you may use any size you prefer.
Since, this dish requires very little ingredients, it can easily lack flavor. I avoid this in my recipe by boiling the pasta in water with chicken bouillon powder added. That simple addition makes a big statement in taste.
Here’s where the debate comes into play. Which cheese should you use?? I will argue with anyone that the American cheese from the deli of your supermarket is the best in this dish! Some will say it’s Velveeta. My mom would say it’s whatever sliced cheese you have in the refrigerator! Just don’t complicate this stuff. It’s simple, it’s classic, and it goes with almost anything! If you pull up to a cookout in Louisiana, you better believe you’ll see a pan of Spaghetti and Cheese or “Cheese Spaghetti”.
Cheese matters. But, it’s the milk for me! Evaporated milk is the best dairy to use in this recipe! It pairs perfectly with that processed “cheese”. Yeah. I know it’s not real. And I don’t care! Follow me. Anyway, don’t mess around and grab that sweetened condensed milk! It’ll break my heart.
Whatever you do, DO NOT ADD SALT BEFORE THE CHEESE MELTS! Don’t play yourself! That cheese is salty. The chicken bouillon you use in the water is salty. You need the cheese to melt before gauging how much salt should be added. The onion powder is important, too. It just brings that little extra “something” to it, ya know?
Alright, I think I’ve covered it all. Nope. I’m lying. This is major. KEEP THE HEAT LOW! Listen, my baby. If you scorch this stuff, you gotta trash it. You may not burn the pasta. But, you will have definitely torched the taste! Just keep the fire low and stir continuously while the cheese melts.
Now, go ahead and start cooking. Make sure you call your Auntie and tell her Coop’s Spaghetti and Cheese is better than hers. We still love her though. Hey, Auntie!!
Delicious and flavorful Baked Ziti recipe that your family will love! Simple ingredients and dynamic flavors combine to make this recipe an instant favorite.
Prep Time10minutes
Cook Time2hours10minutes
Total Time2hours20minutes
Ingredients
1lbground beef
1/2lbItalian sausage
16ouncesziti
2 28 ounce cans crushed tomatoes
2TBStomato paste
1/2cupmerlotoptional
1bell pepperfinely diced
1onionfinely diced
2garlic clovesminced
1tspgranulated sugar
3fresh basil leaveschiffonade
1TBSoregano
1tspfennel seeds
15ozricotta cheese
2cupsmozzarella cheeseshredded
1cupparmesan cheeseshredded or grated
Salt and pepper to taste
Instructions
Preheat oven to 375°F
Brown ground beef and sausage
Drain off the fat
Add in the onions, Bell peppers, and garlic and stir for 3 mins.
Pour in the merlot.
Simmer for 2 minutes.
Add the crushed tomatoes, tomato paste, sugar, oregano, fennel seeds, and half of the basil.
Salt and pepper to taste
Stir, reduce the heat to low, and simmer for 1 1/2 hours.
Prepare ziti according to package instructions
Drain and mix with the sauce.
Spray a 9×13 baking dish or lasagna pan with nonstick cooking spray.
Pour half of the ziti and sauce mixture into the pan.
Add half of the ricotta on top of the pasta and spread it out evenly.
In a separate bowl, toss the mozzarella and parmesan together.
Sprinkle half of the cheese mixture on top of the pasta.
Pour in the rest of the pasta/sauce mix
Then, add the rest of the ricotta in dollops.
Sprinkle the remain cheese on top evenly.
Bake, uncovered, for 40 minutes.
Garnish with the remaining chiffonade basil.
Allow it to cool for at least 20 minutes before serving.