Steak and Smoked Gouda Alfredo


I’m playing restaurant wars again. When I can’t figure out what to cook, I think about my favorite dishes at different restaurants. Then, I try to recreate them at home. For my birthday this year, I went to a local restaurant and ordered their Steak and Smoked Gouda Alfredo. It was delicious. It features sirloin on angel hair pasta (my fave!) covered with a smoked Gouda cream sauce. Then, they top it with tomatoes, bacon, green onions, and more Gouda. It’s dreamy. 

I’m not a fan of bacon. Yes, I know. So, I left it out. But, of course, you may add it to yours. Just fry it before making your sauce. Then use the grease to saute the garlic and proceed with the recipe. I also opted for Linguine instead of angel hair. I’m ALWAYS using angel hair, so I decided to give it a break. Just for today though! Angel hair is bae.

As for the steak, I like mine Medium to Medium Well. So, cook yours to your liking. Use the “palm test” to determine how done the steak is while cooking. Think the thickness of the steak in mind as well. I also like to keep the seasoning very simple in this recipe. I didn’t want any rubs to alter the flavors of the pasta too much.

What are some of your favorite restaurant dishes that you’d like to learn how to recreate at home? Let me know in the comments!

Happy Cooking,

B.Coop

Steak and Smoked Gouda Alfredo
Serves 2
Write a review
Print
Prep Time
10 min
Cook Time
20 min
Total Time
30 min
Prep Time
10 min
Cook Time
20 min
Total Time
30 min
Steak
  1. 1-2 NY strip, Sirloin, or Ribeye steaks
  2. 2-3 cloves garlic
  3. 1 T butter
  4. 2 T Olive Oil
  5. 1-2 sprigs fresh thyme
  6. 2 sprigs fresh rosemary
  7. salt and pepper to taste
Alfredo Pasta
  1. 1 lb linguine or pasta of your choice
  2. 1 T butter
  3. 1 T minced garlic
  4. 2 cups heavy cream
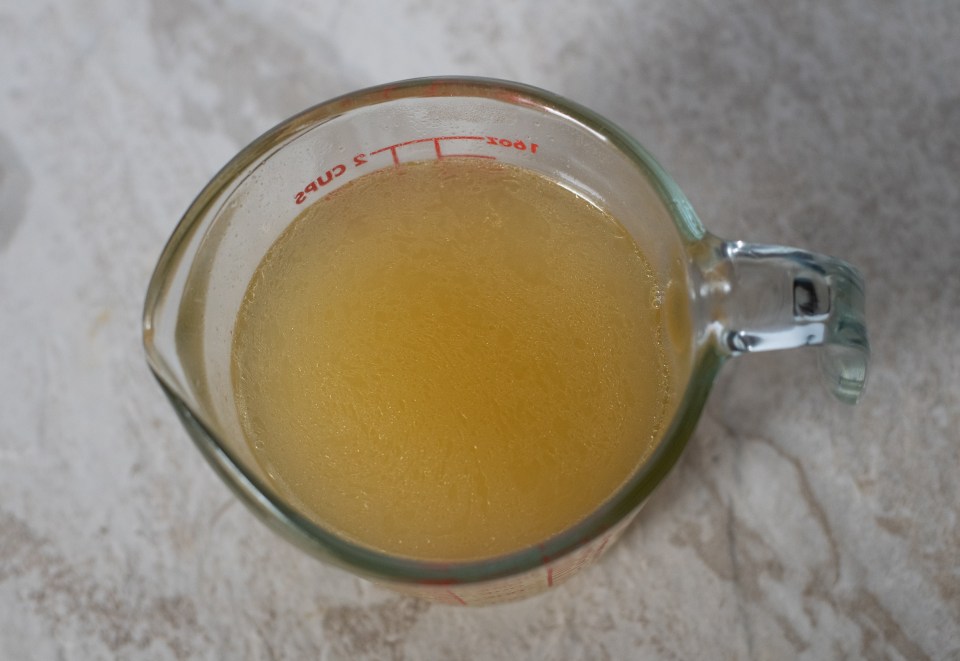
  5. 1/3 cup chicken broth
  6. 1 cup shredded Smoked Gouda
  7. salt and pepper to taste
  8. garnish with tomatoes, green onions, and bacon (optional)
Steak
  1. Heat cast iron skillet in the oven on 350 degrees F for 15 minutes
  2. Allow steak(s) to come to room temperature
  3. Season both sides with salt and pepper
  4. Remove skillet from the oven, pour in oil, and turn the heat to high.
  5. Add in the steak
  6. Sear steak on both sides for 3 mins. per side**
  7. Add in butter, garlic, thyme, and rosemary.
  8. Once butter melts, baste steak with it constantly.
  9. Flip the steak every 1-2 mins until it reaches your desired level of doneness.
  10. Remove steak from pan and allow it to rest for 10 mins before slicing.
Sauce
  1. Melt butter in a pan
  2. Add in garlic and saute for 30 secs.
  3. Pour in heavy cream and broth.
  4. Bring to a simmer.
  5. Add in the cheese.
  6. Stir until sauce thickens and cheese melts.
  7. Taste and add salt and pepper as needed.
  8. Prepare pasta according to package directions.
  9. Drain pasta and toss in the sauce.
  10. Divide the steak and top the pasta with it.
  11. Garnish with tomatoes, green onions, and bacon.
  12. Enjoy!
Notes
  1. **if your steak is less than 1 1/2 inch in thickness, brown for 1-2 mins per side
Coop Can Cook https://coopcancook.com/

The Whole Box

Let’s be honest. Eating clean and healthy isn’t easy. All of the “Do Not Eat” lists and ingredient checks can become nerve-wrecking. Especially if you’re always on the go. If you’re strapped for time and are getting bored with your health journey, then this is for you! The Whole Box is a subscription service founded by a good friend of mine. Hey, Katie Belle! The Whole Box delivers clean and Whole 30 compliant goodies to your door every month! I was so excited to receive mine! It also includes coupons to save you some coins! We know that healthy and organic food can be very costly. But, with the Whole Box you save and are introduced to products by brands you may not be familiar with. Katie and her team have definitely did their homework! They select quality products each month while saving you money and shopping time.

Also included in the box is a product guide listing each product in detail. I’ll review each of the items with you:

Cookies, my reviews will always be 100% honest! I will never mislead you or lie for profit. NEVER! With that being said, these Wild Zora Meat & Veggie Bars had me shook! I was very apprehensive about try them. I’m a texture girl, so regardless of taste, if it doesn’t feel right in my mouth (PAUSE) I’m not with it! While the flavors in these Wild Zora bars were nice, I could NOT get past how it felt while chewing. If you’re a fan of jerky and turkey bacon, these are for you! The Whole Box provided two packets of Justin’s Almond Butter in the October box. I love almond butter! I especially enjoy it with apples and bananas. ISSA SNACK! Made of only two ingredients, roasted almonds and palm oil, Justin’s Almond Butter is as guilt free as it is delicious!
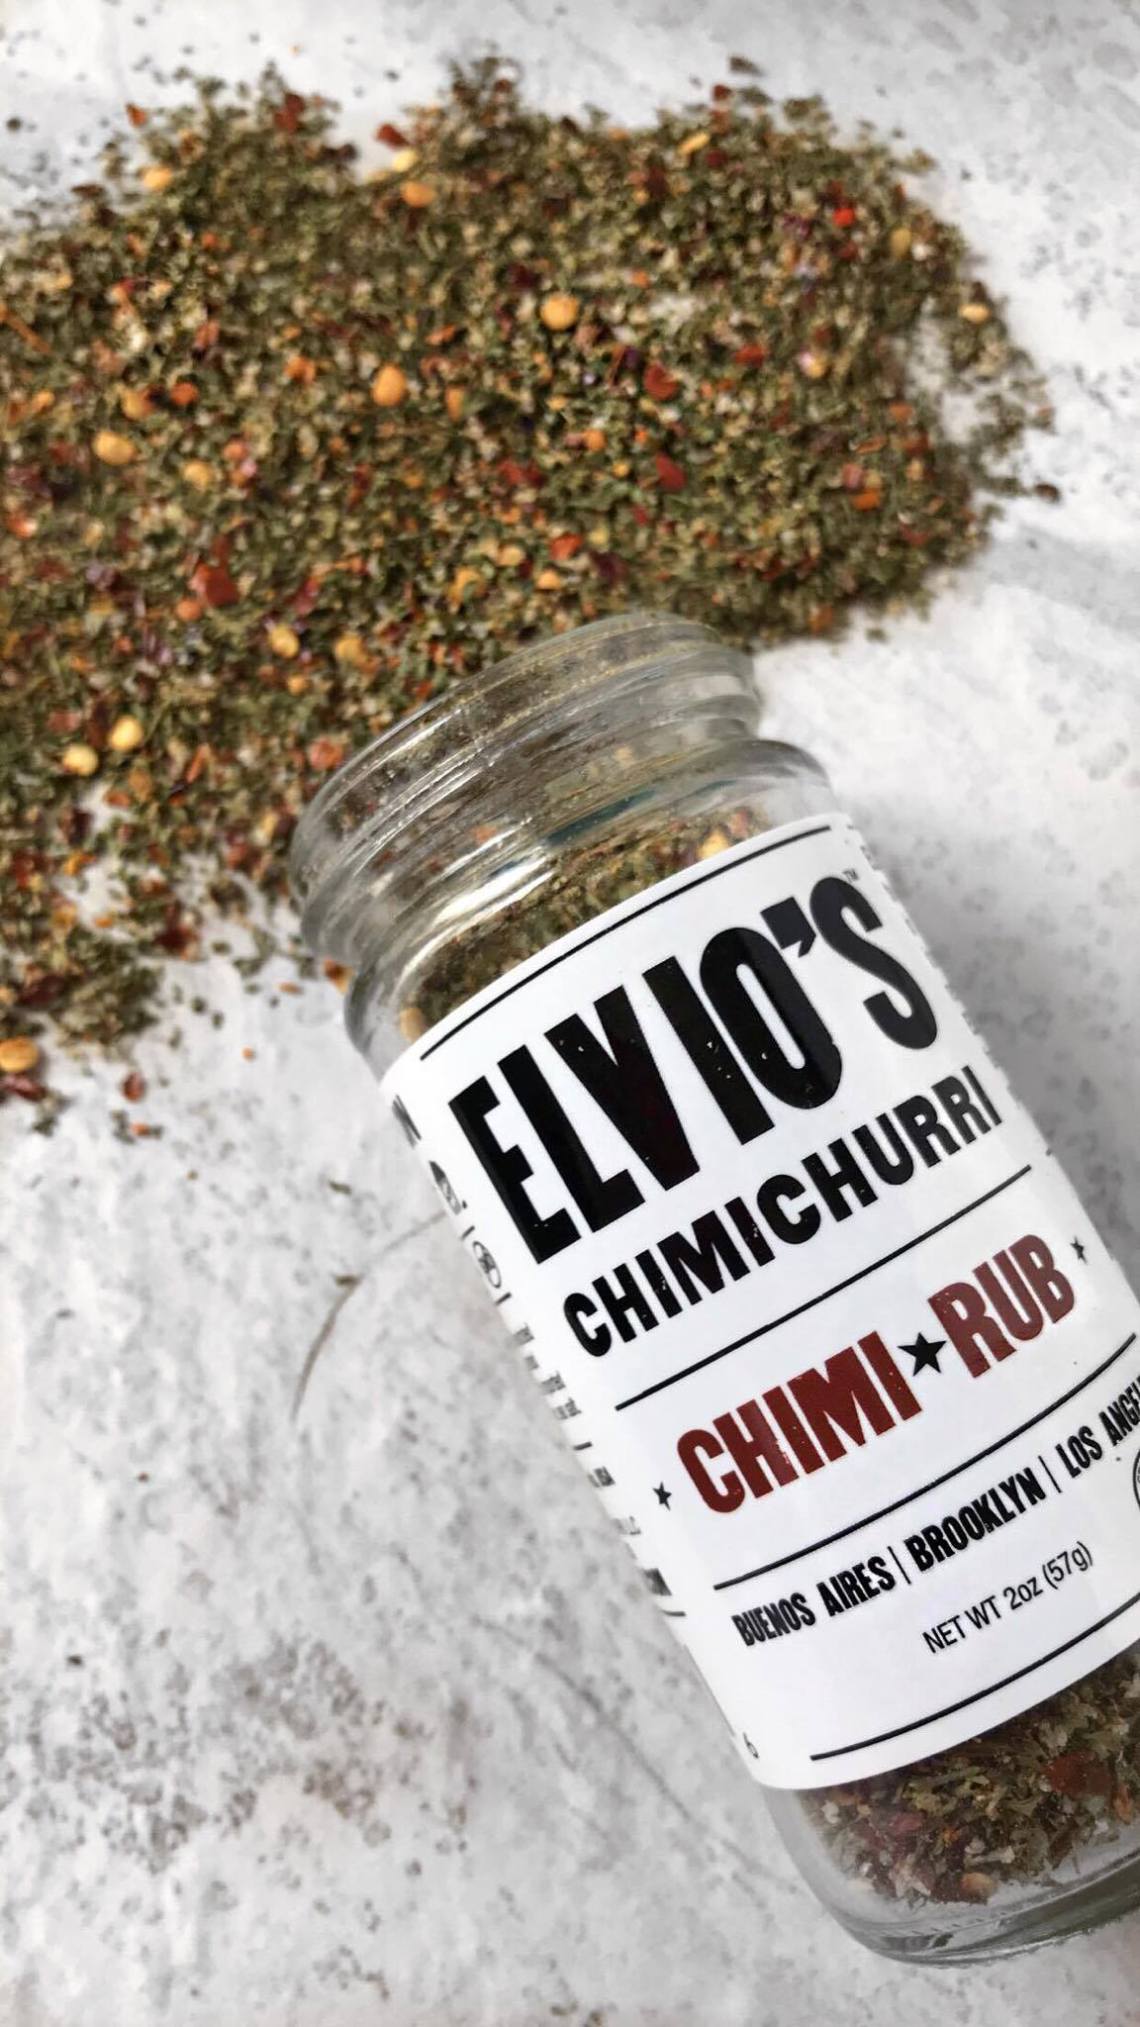
Before the Whole Box, I have never found a protein bar that I actually enjoyed. RXBar has changed the game! With 12g of protein and no filler preservatives, RXBars have instantly become my go to brand for protein bars. The Whole Bar provided three different flavors and each one of them are GOOD! Two thumbs up for RXBar!Another favorite of the box is the Young Living Lemon oil. This oil can be used in recipes AND in an oil diffuser! Cool, right?? It taste super refreshing and not at all like a bottled lemon juice. It literally tastes just like freshly grated lemon zest! Add a couple drops into your ice water and you’ll never want another glass without it!I just recently started drinking coffee. I wanted to feel more like an adult. I’m drinking decaf. Stop laughing! I know, I know. That’s nothing. I’m taking baby steps, okay?! But, this Nutpods dairy-free creamer is the new companion to my caffeine free coffee. They sold me at “creamy” and that is exactly what it is! It’s unsweetened, so it’s the perfect vegan substitute for half and half. I’ll definitely be trying it in the dressing recipe the Whole Box provided.Chimichurri gets allllll of the heart eyes from me! One of my favorite sauces! So, you know I was hype when I pulled Elvio’s Chimi Rub out of the box! Two words: The Smell. Heavenly! According to the Whole Box’s product guide, this rub is “great on everything from steak to fish…”. You’ll be seeing this stuff in many recipes to come!
I love this box! From the packaging to the quality of each product, the Whole Box has definitely won me over! I highly recommend that you get one. They were nice enough to give my Cookies $5 off your first order! Visit https://thewholebox.com/ and use the code: COOP5 at checkout. Special thanks to the Whole Box for sending me your very first box for review! 

Happy Cooking,

B. Coop

Hibachi Dinner at Home

One of my goals with this site is to show my Cookies how to make restaurant quality meals in your own kitchen. Call me crazy, but I truly believe anyone can cook with the right guidance. Good food looks intimidating. Especially, when the chefs are flipping eggs in hats, lighting fires, and juggling spatulas! Coop can’t teach you that unfortunately. BUT, I can show you how to make a Hibachi dinner at home that will rival your favorite restaurant!

For me, the highlight of a Hibachi meal is the Yum Yum Sauce! I pour that stuff over the entire plate! It’s surprising that something so good is so easy to make using very few ingredients. Just be sure to make the sauce a day or at least a night in advance to give those flavors time to bloom. 

I’m using a cast iron, two burner griddle for this. I love this thing! It allows me to cook two components of the Hibachi dinner at the same time. Making me feel like a real pro in these streets! But, you certainly don’t need it. You may use separate pans, skillets, woks, or even an electric griddle. No need to purchase extra tools just for this. Use what you have!

I use two types of oils. Vegetable oil and sesame oil. The sesame oil is used mainly for flavor which is why it is added in at the same time as the soy sauce and other flavoring agents. It adds that Hibachi flavor I’m used to from the restaurant. It also has a thicker consistency than other oils. A little goes a long way. We want to use it sparingly, so be sure to stick to my measurements.  If you can’t find the sesame oil, don’t worry. The taste will be perfectly fine without it. And, the vegetable oil is used to coat the cooking surface to prevent sticking and burning, of course.

When it comes to fried rice, I like to have my rice cooked and chilled in the fridge a day before cooking. But, Hibachi rice is a little less demanding. You never want to cook your rice and then immediately use it for these type of recipes though. I like to cook the rice a couple of hours before using it to allow it to cool some. This prevents it from getting mushy and overcooked. I only use eggs and sweet onions in my Hibachi rice, because that is the way it is prepared at my favorite, local Japanese restaurant. But, feel free to add peas and carrots to your liking.

Hibachi veggies! Use your faves! I kept it simple and just used sweet onions and zucchini in this recipe. But, I have used broccoli, carrots, and mushrooms as well. Customize your Hibachi dinner to you and your family’s taste.

As for the protein, I only used steak and shrimp in the video. However, I do provide you with the steps for chicken as well. Hibachi is fairly simple cooking. The same cooking method is basically used for all of the protein. The cooking time is really the only variable.

I’m able to find garlic butter in my local supermarket. But, if it’s hard to come by in your area, I gotcha covered! Garlic Butter is very easy to make at home as well. And it really takes the flavors of the Hibachi meal up a few notches! The recipe is below. 

Hope my recipe is helpful and encouraging enough for you to try this dinner idea for your family! It’s very fun and not as complicated as it looks! 

Happy Cooking,

B. Coop

Hibachi Dinner at Home
Serves 2
Write a review
Print
Prep Time
20 min
Cook Time
30 min
Total Time
50 min
Prep Time
20 min
Cook Time
30 min
Total Time
50 min
Yum Yum Sauce
  1. 1 1/4 cup mayo
  2. 1 tsp granulated sugar
  3. 1/2 tsp garlic powder
  4. 1/4 tsp paprika
  5. 1 T melted butter (unsalted)
  6. 1 tsp tomato paste
  7. 1/2 tsp cayenne pepper
  8. 2-3 T water
Ginger Sauce
  1. 1/2 onion (chopped)
  2. 2 T lemon juice
  3. 1 T grated ginger
  4. 1 tsp minced garlic
  5. 1/4 cup soy sauce
  6. 1/2 tsp white vinegar
  7. 1/4 tsp sugar
Hibachi Rice
  1. 2 cups cold, cooked rice (white rice)
  2. 1 T sesame oil
  3. 2 T butter
  4. 2 T soy sauce
  5. 1/2 sweet onion (chopped)
  6. 1 large egg
  7. chopped green onions
Hibachi Noodles
  1. 1/2 lb or 6 oz noodles (Udon, Rice, Ramen, or Linguine)
  2. 2 tsp sesame seed oil
  3. 1 T garlic butter
  4. 2 T soy sauce
  5. 1 T teriyaki sauce
  6. Optional: 3-4 green onions (chopped, both the white part and green part, separated)
Hibachi Vegetables
  1. 1 large zucchini (quartered)
  2. 1 sweet onion (chopped)
  3. 1 T vegetable or canola oil**
  4. 1 tsp sesame oil
  5. 1 T soy sauce
  6. 1 T garlic butter
  7. pinch of salt
Hibachi Steak and/or Chicken
  1. 1 pound of chicken breast and/or sirloin steak (cut in bite sized pieces)
  2. 1 T vegetable or canola oil**
  3. 1 tsp sesame oil
  4. 2 T garlic butter
  5. 2 T soy sauce
  6. 1 T teriyaki sauce
  7. salt and pepper to taste
Hibachi Shrimp
  1. 1 lb raw shrimp
  2. 1 T vegetable or canola oil**
  3. 2 T garlic butter
  4. 1 T soy sauce
  5. 1 T teriyaki sauce
  6. lemon juice (optional)
Garlic Butter
  1. 1 stick unsalted butter (softened at room temp)
  2. 1 T minced garlic
  3. 1 tsp chopped parsley
  4. 1/2 tsp black pepper
  5. 1/2 tsp Italian seasoning
Yum Yum Sauce
  1. (Make 1 day before serving.)
  2. Mix all ingredients (except water) together well.
  3. Add 1-2 T of water to reach your desired sauce consistency.
  4. Chill overnight in the refrigerator.
  5. Serve at room temperature.
Ginger Sauce
  1. Blend all ingredients in a food processor or blender.
  2. Refrigerate until ready to use.
Hibachi Rice
  1. Heat oils in a wok or skillet.
  2. Add onion and saute for 1-2 mins
  3. Add in the egg and lightly scramble it.
  4. Once egg is nearly cooked, add in the cold rice, butter, and soy sauce.
  5. Toss rice and egg together until rice is warm and eggs are cooked completely.
  6. Salt and pepper to taste if needed.
  7. Add chopped green onions.
  8. Remove from pan and serve.
Hibachi Noodles
  1. Cook noodles according to package instructions and drain well.
  2. Heat oil
  3. Add in the remaining ingredients except for the green part of the green onions
  4. Toss to combine.
  5. Once noodles are very coated and hot, add in the green onions
  6. Adjust seasoning to your liking if needed.
  7. Serve.
Hibachi Veggies
  1. Heat oils into the wok or skillet at medium high heat
  2. Add in the zucchini, soy sauce, butter, and a pinch of water.
  3. Saute for 5 minutes
  4. Add in onion and continue to saute until all veggies are tender.
  5. Serve.
Steak
  1. Heat veggie oil in a skillet at medium high heat
  2. Add in the steak and sprinkle on the salt and pepper.
  3. Saute steak.
  4. Once steak begins to brown, add in the remaining ingredients.
  5. Continue to cook the steak to your desired level of doneness.
Chicken
  1. Heat veggie oil in pan at a medium heat
  2. Add in chicken and all remaining ingredients.
  3. Continue to cook the chicken until completely done.
  4. Saute to avoid burning.
Shrimp
  1. Heat oil in skillet or wok
  2. Add in shrimp
  3. Add the butter, soy sauce, and teriyaki.
  4. Saute until shrimp are cooked.
  5. Be careful not to overcook.
  6. Add a squeeze of lemon juice.
Garlic Butter
  1. Place all ingredients into a food processor. (You can also stir it by hand in a bowl.)
  2. Blend well.
  3. Spoon butter in between plastic wrap and mold into desired shape. Or store in a tightly sealed container.
  4. Refrigerate until firm.
Notes
  1. **Please use the vegetable oil as needed! I provide measurements in case you're cooking each component separately. If you are using the same griddle, skillet, etc., you may not need to add oil with the addition of each meal component. Use only as needed.
  2. When seasoning with salt to taste, keep in mind that you'll be using soy sauce as well. Soy sauce will add sodium too.
  3. I used a cast iron griddle for this meal to cook a couple components at once. However, a skillet, wok, and pan maybe used as well. Use what you have.
  4. If you make your own Garlic Butter, it will last for up to one week in the refrigerator. Store tightly in plastic wrap or a sealed container.
Coop Can Cook https://coopcancook.com/

Boneless Buffalo Wings

It’s football seasonnnnnnnnnnnnnnnnnnnnnnn!!!! I’m not excited. Can’t you tell? My Saints lost last night. I broke a glass. I felt better. The end. It’s okay. This is only the beginning. Prayer changes things. Lettuce pray! 

Teams play horribly from time to time. That’s life. So, you’re gonna need a table of great food to ease your nerves. Start with the wings! I love a boneless wing! Even though it’s not actually a boneless wing at all. Just a plus sized nugget. They’re magical. And easy to make. Watch me put all of your favorite wing spots to shame…

Use this as your go to boneless wing batter recipe. Feel free to play around with the sauces. I love these things with my Bourbon chicken sauce too! Here’s that recipe http://www.coopcancook.com/bourbon-chicken-wings/

Instead of just dropping these guys in the buffalo/hot sauce as is, doctor it up a bit. It adds a little something, something, thickens the sauce, and kicks the flavor up a notch, or 20. If you would like to see more game day food recipes, let me know in the comments!

Love,

B. Coop

Boneless Buffalo Wings
Serves 3
Write a review
Print
Prep Time
20 min
Cook Time
5 min
Total Time
25 min
Prep Time
20 min
Cook Time
5 min
Total Time
25 min
Brine
  1. 1/4 cup kosher salt
  2. 1/4 cup granulated sugar
  3. 4 cups cool water
Chicken
  1. 2 lbs chicken breast (cut into 2 inch pieces)
  2. 1 T seasoned salt
  3. 1/3 tsp cumin
  4. 1/3 tsp black pepper
  5. 1/2 tsp chili powder
  6. 1 1/2 cup all purpose flour
  7. 1/3 cup cornstarch
  8. 1 tsp onion powder
  9. 1 tsp garlic powder
Wash
  1. 1 beaten egg
  2. 1/2 cup milk
Sauce
  1. 6 T unsalted butter
  2. 2 cups Buffalo or Hot Sauce
  3. 1 T Worcestershire sauce
  4. 1 tsp Cornstarch
Brine
  1. Mix water, salt, and sugar together in a bowl until it dissolves.
  2. Add in chicken and refrigerate for at least 30 mins.
Chicken
  1. In a bowl, combine all spices, flour, and cornstarch. Mix well.
  2. In a separate, shallow bowl, whisk the egg and milk together.
  3. Dredge chicken pieces into the flour mixture, then wet mixture, and back into the flour mixture.
  4. Repeat the process twice to double coat the chicken.
  5. Place chicken on a parchment or wax paper lined surface.
  6. Refrigerate for 20 to 30 mins.
  7. Heat oil in pan or deep fryer to 350 degrees F.
  8. Fry chicken for 4-5 mins or until golden brown and cooked through.
  9. Drain on paper towels.
Sauce
  1. Melt butter in a saucepan.
  2. Stir in remaining ingredients.
  3. Whisk on medium heat until sauce thickens.
  4. Pour into a bowl and toss chicken into sauce to coat.
  5. Serve with your desired dipping sauce, celery, and/or french fries.
  6. Enjoy!
Coop Can Cook https://coopcancook.com/

Chicken & Spinach Stuffed Shells

Again, I’ve found myself with an excess of chicken in my freezer. Thank God for the overflow! However, this chicken’s gotta go. I barely have room for my frozen pineapple emergency stash. So, today, we’re making some Chicken & Spinach Stuffed Shells!

I’m using cream cheese instead of ricotta. Because, everything’s better with cream cheese. And i’m not a fan of ricotta. If you’re with it then use it. It all works. Just don’t skip that Ranch seasoning. BOMB! It adds a certain touch of flavor to it. 

You can shred the chicken if you’d like as well. I wanted to cube it today. I felt cube-ish. Just make sure you season it well. You know how I feel about seasoning every element of the dish. So, cooking the shells in chicken base or broth is mandatory for me. This also keeps us from over doing it with the salt in the stuffing. We don’t need it. The flavor with be there.

Love,

B. Coop

Chicken & Spinach Stuffed Shells
Serves 5
Write a review
Print
Prep Time
20 min
Cook Time
30 min
Total Time
50 min
Prep Time
20 min
Cook Time
30 min
Total Time
50 min
Ingredients
  1. 1 lb jumbo shells
  2. 1 T chicken base or 3 chicken bouillon cubes
Alfredo Sauce
  1. 3 T butter
  2. 1 T minced garlic
  3. 2 cups heavy whipping cream
  4. 1/2 cup shredded parmesan cheese
  5. 1 tsp onion powder
  6. salt and pepper to taste
Stuffing
  1. 2 cups cooked chicken
  2. 8 oz package of cream cheese (softened)
  3. 1 cup spinach (chopped)
  4. 1 T Ranch seasoning mix
  5. 1/2 tsp onion powder
  6. 1/2 tsp garlic powder
  7. 1/2 cup shredded Mozzarella
  8. 1/3 cup shredded Parmesan
  9. 1 beaten egg
Topping
  1. 1/3 cup Mozzarella cheese
  2. 1/4 cup grated Parmesan cheese
  3. chopped basil or parsley to garnish
Instructions
  1. Preheat oven to 350 degrees F
  2. Bring a large pot of water to boil
  3. Add in chicken base or cubes and the shells
  4. Cook according to package instructions
  5. Stir often to keep from sticking
  6. Drain.
Sauce
  1. Melt butter and saute garlic
  2. Pour in heavy cream
  3. Once sauce comes to a low simmer add in cheese and season to taste
  4. When the cheese melts and sauce thickens, remove from heat
Stuffing
  1. Mix all ingredients together well.
  2. Stuff each shell with one tablespoon of the stuffing.
Assembly
  1. Ladle one scoop of sauce to the bottom of a 13x9 baking dish and spread it out
  2. Place shells on top of the sauce in the dish
  3. Pour the remaining sauce evenly over the shells.
  4. Cover dish with aluminum foil and bake for 30 mins.
  5. Sprinkle on the rest of the cheese and bake, uncovered, until cheese melts.
  6. Garnish with fresh parsley or basil.
  7. Enjoy!
Coop Can Cook https://coopcancook.com/

Chicken Parm Pizza

Facebook made me so hungry last week I completely changed my recipe plans. I saw a video of a restaurant that combined two of my favorite dishes. Chicken Parm and Pizza! OMG! I had to have it! And the fun part is that the chicken is the crust! I knew I had to make my version and share it with my Cookies.

I chose to make two personal sized pizzas to make it easier to fry. But, if you have a large fryer, feel free to make one big pie! I suggest freezing the chicken crust for at least 4 hrs. You can even make extra and freeze them until you’re ready to use them. 

I absolutely love Chicken Parmesan. I have to make sure that every component of the dish is well seasoned. This pizza version is no different. I season the chicken and grind it up in my food processor. You can also just buy ground chicken. I like to do my own. I also season the eggs. We want a super flavorful pizza!

And the cheese!! Do NOT forget to use Parmesan cheese!!! So, many Chicken Parmesan recipes load up on the mozzarella, but forget the Parm. Don’t do it! If you can, please buy fresh cheese and shred them yourselves. I can’t stress how much better the quality is. I think this is my new favorite pizza! I hope you enjoy it too.

Love,
B. Coop

Chicken Parm Pizza
Serves 2
Write a review
Print
Prep Time
4 hr
Cook Time
30 min
Total Time
4 hr 30 min
Prep Time
4 hr
Cook Time
30 min
Total Time
4 hr 30 min
Ingredients
  1. 1 lb chicken breasts (or ground chicken)
  2. 1 T Italian seasoning
  3. 1 tsp onion powder
  4. 1 tsp garlic powder
  5. 1 tsp salt
  6. 2 eggs
  7. 1 cup all purpose flour
  8. 1 cup italian style bread crumbs
  9. 3 T grated parmesan cheese
  10. 1 cup marinara or pizza sauce
  11. 2 cup fresh mozzarella cheese
  12. vegetable or canola oil for frying
  13. fresh basil
Instructions
  1. Cut chicken breasts into cubes and place into a food processor
  2. Add the onion and garlic powders, 1 basil leaf, and 1/2 of the Italian seasoning
  3. Blend until chicken is ground
  4. Line (2) 8 or 9 inch cake pans with plastic wrap
  5. Divide the chicken equally into the pans and press to flatten into the bottom of the pans
  6. Wrap tightly with the plastic wrap and freeze for at least 4 hours
  7. Preheat oven to 400 degrees F
  8. Put the flour, eggs, and breadcrumbs into 3 separate dishes
  9. Season the eggs with the remaining Italian seasoning and beat them
  10. Season the breadcrumbs with 1 T parmesan cheese
  11. Remove the chicken crusts from the plastic
  12. Coat the crusts in the flour, then the eggs, and lastly, the breadcrumbs
  13. Heat 1/2 inch of oil in a frying pan or heat a fryer to 350 degrees F
  14. Fry each chicken crust until golden brown; about 3-4 mins per side if using a frying pan
  15. Transfer to paper towels after frying
  16. Place crusts on a baking sheet
  17. Top with sauce and all remaining cheeses
  18. Bake for 10 mins or until cheese is bubbly
  19. Garnish with fresh, shredded basil
  20. Enjoy!
Coop Can Cook https://coopcancook.com/

Golden Oreo Cheesecake Cupcakes

Who doesn’t love Oreos? They were on sale at the grocery store last week and I had to buy some. I immediately thought of you guys and decided to do a recipe with them. That’s the only reason that would keep me from eating them myself. I didn’t want to do the usual chocolate Oreo cheesecake recipe. I wanted to do something with the red velvet ones, but they were gone. So, Golden Oreo Cheesecake Cupcakes it is!

Long recipe title right? Sheesh! But, these little things are good! I don’t like my cheesecake super silky. So, adding a little bit of flour gives it more of a NY cheesecake texture. If you can, please don’t skip serving these with fresh whipped cream. 

Love,

B. Coop


Golden Oreo Cheesecake Cupcakes
Yields 12
Write a review
Print
Prep Time
15 min
Cook Time
20 min
Total Time
35 min
Prep Time
15 min
Cook Time
20 min
Total Time
35 min
Ingredients
  1. 1 family sized package Golden Oreo cookies (12 whole, 5-6 finely chopped)
  2. 2 8 oz packages of cream cheese (softened)
  3. 1/2 cup granulated sugar
  4. 2 T sour cream
  5. 1 tsp vanilla extract
  6. 1 T all purpose flour
  7. 2 large eggs (room temp)
  8. pinch of salt
Instructions
  1. Preheat oven to 275 degrees F
  2. Line a cupcake pan with cupcake liners and place one, whole Oreo at the bottom of each liner
  3. In a bowl using an electric mixer, mix cream cheese and sugar together
  4. Add in one egg at a time mixing in between the addition of each egg
  5. Now, add in the flour, sour cream, and salt. Mix well
  6. Fold in the finely chopped Oreos by hand. Do not use the mixer. (Reserve some roughly chopped Oreo pieces to garnish later.)
  7. Divide the batter into the cupcake pan evenly
  8. Bake for 20-22 mins or until the filling sets.
  9. Allow to cool in the refrigerator for at least 3 hours
  10. Top with whipped cream (optional) and garnish with the remaining Oreo pieces
  11. Enjoy!
Coop Can Cook https://coopcancook.com/

Unstuffed Bell Peppers

I love stuffed bell peppers. My family enjoys them too. I make them often for holidays and gatherings. But, I always notice that very few of my family members would eat the whole pepper. I’d see empty pepper shells on almost every plate. After I’d parboiled and seasoned the peppers for these ingrates!! Who am I kidding? I don’t eat the dang pepper either. That’s why this recipe is ideal my crew and me!

All the elements you love about stuffed peppers without having to waste peppers! Genius, right?! Feel free to use ground beef if you prefer. And you can switch the cheese up to your liking as well. Wild rice works too. You can even omit the rice all together if you’re watching your carbs. Unstuffed Bell Peppers are a wonderful midweek meal. Great for meal prepping too. Try it.

Love,

B.Coop

Unstuffed Bell Peppers
Serves 5
Write a review
Print
Prep Time
10 min
Cook Time
25 min
Total Time
35 min
Prep Time
10 min
Cook Time
25 min
Total Time
35 min
Ingredients
  1. 1 lb ground turkey or beef
  2. 1 diced bell pepper
  3. 1 diced onion
  4. 1 T minced garlic
  5. 14.5 oz can petite diced tomatoes
  6. 1 cup cooked rice
  7. 1/2 cup shredded parmesan
  8. 1/2 cup cheddar cheese
  9. 1 tsp onion powder
  10. 1 tsp garlic powder
  11. salt and pepper to taste
Instructions
  1. Preheat oven to 350 degrees F
  2. Brown meat in an oven safe skillet and drain excess fat
  3. Add in bell peppers and onions and saute for 5 mins or until tender and brown
  4. Add garlic
  5. Pour in tomatoes; do not drain
  6. Add in spices
  7. Lower heat, cover, and simmer for 10 mins
  8. Add in rice
  9. Taste and adjust seasoning
  10. Stir in the parmesan cheese
  11. Sprinkle cheddar cheese on top
  12. Bake, uncovered, until cheese melts
  13. Garnish with green onions
  14. Enjoy!
Notes
  1. If you don't have an oven safe skillet, just cook everything in a pan and transfer it to a baking dish.
Coop Can Cook https://coopcancook.com/

Southern Green Beans

Cookies, I’ve been on a veggie kick. I’ve been craving nothing, but green veggies. Thank God! Oh, hold up. NO, Coop is not baking anything in her oven, okay. That’s not why I’m having cravings. Cut it out. lol 

I love green beans. But, I don’t like them with meat. Strange? Probably. But, you know I’m a weirdo already. Don’t worry. I’m showing you to cook delicious Southern-style green beans with and without meat!

Easy, right? I used frozen green beans in this recipe. But, I bought them from my local fruit stand which freezes their fresh green beans without any additives or preservatives. So, the flavor is super fresh tasting even after freezing them! If you’re using fresh green beans, then the cooking time will be longer. Like 1-2 hours longer. And if you’re using canned beans, PLEASE PLEASE PLEASEEEEE drain that liquid in the can and use fresh water. Why you ask? Just taste that liquid that’s in the cans and see if you still want to cook with it. Come back and tell me about it too.

Love,

B. Coop

Southern Style Green Beans
Serves 4
Write a review
Print
Prep Time
10 min
Cook Time
25 min
Total Time
35 min
Prep Time
10 min
Cook Time
25 min
Total Time
35 min
Ingredients
  1. 1-2 lb frozen green beans
  2. 1 diced onion
  3. bacon ends (as much as you want)
  4. 2-3 potatoes (cut into 1 inch chunks)
  5. 2 T butter
  6. 1 cup water
  7. 2 tsp chicken base
  8. 2 tsp onion powder
  9. 1 tsp garlic powder
  10. 1 T or to taste Cajun seasoning
Instructions
  1. Add bacon ends to a pot set at a medium high temp
  2. Fry bacon ends until it starts to brown and release grease
  3. Add in butter and onions
  4. Saute until onions brown and butter melts
  5. Add in the water and chicken base
  6. Bring to a simmer
  7. Add the green beans, potatoes, and all spices to the pot
  8. Lower heat, cover, and cook for about 20-25 mins or until potatoes are tender
  9. Turn off the heat, taste and adjust seasoning
  10. Enjoy!
Meatless Version
  1. Omit meat and follow the recipe above. Chicken base may also be omitted.
Coop Can Cook https://coopcancook.com/

Chicken Salad

It’s hot. My attitude is horrible. I went off on my fridge, because it shot out crushed ice instead of cubes. Wasn’t the refrigerator’s fault. Hell, I’m the one who pressed the wrong option. I’m just HOT! Which means, simple and cool cooking ONLY! I’m giving you my legendary Chicken Salad recipe.


Yes, I used canned chicken. SHOLE DID! I love it in chicken salad. I’ve tried cooking my own chicken and stuff. But, it just didn’t give me the “chicken salady” taste I was looking for, you know? Don’t you dare stick your nose up at my canned chicken before you try it! You know you’ve eaten canned tuna for years before you got all high and mighty and started eating the kind in the vacuum sealed packs! Tell the truth!

I’m eating the salad on these balsamic, beet crackers. So good! I love making lettuce wraps with it too. How do you like to eat your chicken salad? Tell me in the comments!

Love, 

B. Coop

Chicken Salad
Serves 5
Write a review
Print
Prep Time
10 min
Total Time
10 min
Prep Time
10 min
Total Time
10 min
Ingredients
  1. 12.5 ounce can Premium White Chunk Chicken Breast (It's just a can of chicken, boo.)
  2. 2 hard boiled eggs
  3. 1/2 stalk celery (finely chopped)
  4. 1 T mayonnaise
  5. 1 T pickled relish (sweet or dill; your choice, kid)
  6. 1 tsp Accent seasoning
  7. 1 tsp onion powder
Instructions
  1. Drain water from the canned chicken; add chicken to a bowl
  2. Peel and roughly chop eggs and add them to the chicken
  3. Then add remaining ingredients and mix well
  4. Taste and adjust seasoning, if needed.
  5. Chill in the refrigerator for at least one hour before serving
  6. Enjoy!
Coop Can Cook https://coopcancook.com/