Cottage/Shepherd’s Pie

Cottage/Shepherd’s Pie? I’m gonna explain. Don’t worry! There is lamb in traditional Shepherd’s Pie. Shepherd, sheep, lamb…of course. But, many of us in America opt to use ground beef instead of lamb due to availability and taste preferences. Doing so, turns Shepherd’s pie into Cottage pie! Now, look, if you enjoy lamb, use it! I just can’t eat my childhood homie, Lamb Chop. Okay, now that that’s out of the way, let’s get to the good stuff!

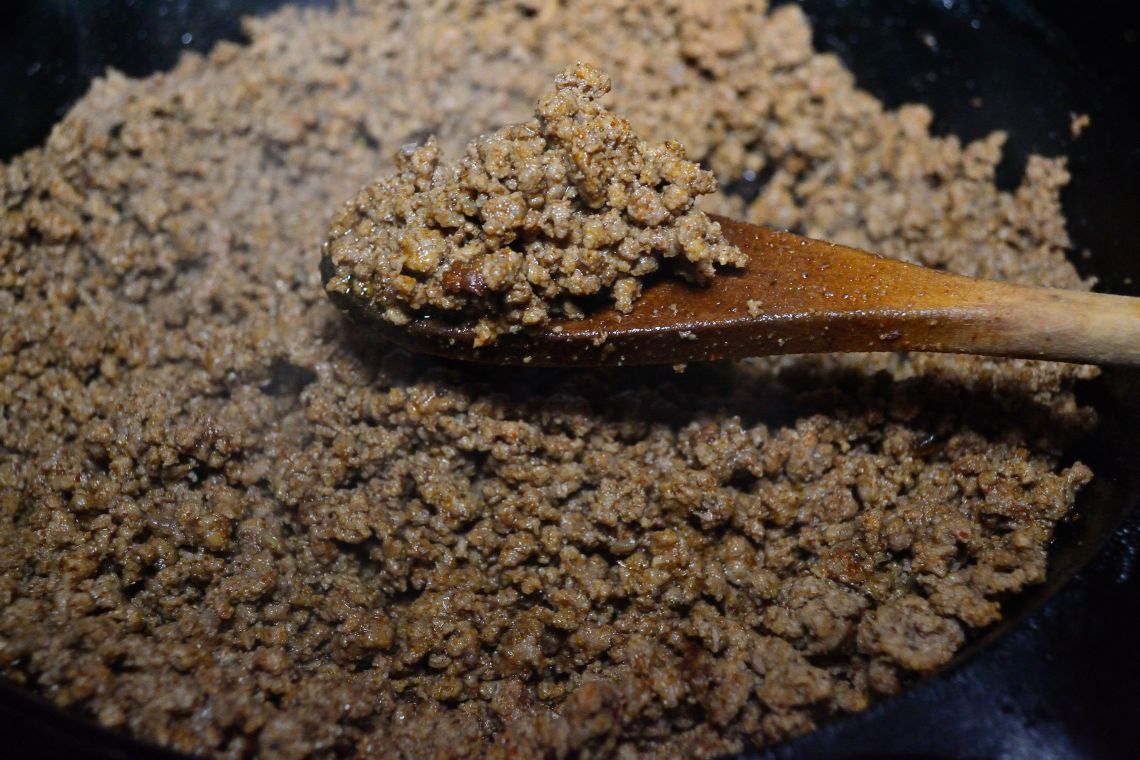
Comfort food heaven, right?? That savory beef mixture and creamy, decadent potatoes!! Goodness! Just bliss especially during the wintertime. My Cookies know I love a good red wine with dishes that include beef. And it’s amazing in this recipe. The consistency should be that of “minced meat”. Not stew like and loose.

Don’t skip the egg yolk in the potatoes. It’s a binder. And the cheese helps to brown the top beautifully. I used Parmesan, but white cheddar is great in this recipe as well. Everything is already cooked, so we’re only baking it to brown the top of the potatoes and stiffen them up a bit. I place it on the top oven rack. But, you can also just use the middle rack and place a baking sheet under you skillet or casserole dish. 

Speaking of skillet and dishes, I like to prepare this in my 9 inch cast iron skillet. Easy clean up as I am cooking, baking, and serving it all in one skillet! If you don’t have an oven safe skillet or pan, just transfer it over to a baking dish. 

Cottage/Shepherd's Pie
Write a review
Print
Prep Time
30 min
Cook Time
20 min
Total Time
50 min
Prep Time
30 min
Cook Time
20 min
Total Time
50 min
Meat
  1. 1 lb lean ground beef or lamb
  2. 1 T olive oil
  3. 1 onion (grate it or finely chop it, whatever works, baby!)
  4. 1 celery stalk (finely chopped)
  5. 1/3 cup grated carrots
  6. 1 T minced garlic
  7. 2 T all purpose flour
  8. 1 T tomato paste
  9. 2 T Worcestershire sauce
  10. 1 tsp onion powder
  11. 1 tsp garlic powder
  12. 1/3 cup dry red wine
  13. 1/3 cup beef broth
  14. 1/2 cup frozen peas (optional)
  15. seasoned salt and pepper to taste
Potatoes
  1. 4 russet or yukon gold potatoes
  2. 3 T butter (room temp)
  3. 2 T cream cheese (softened)
  4. 2 T heavy cream
  5. 1 tsp garlic powder
  6. 1/3 cup Parmesan (shredded)
  7. 1 egg yolk
  8. salt to taste
  9. fresh parsley to garnish
Meat
  1. Preheat oven to 375 degree F
  2. Heat oil in a skillet
  3. Crumble in the meat and brown
  4. Add in carrots, onions, and celery
  5. Saute until tender; about 5 mins
  6. Add garlic and saute for 30 secs
  7. Sprinkle in the flour and stir until it coats the meat
  8. Add the tomato paste and stir
  9. Now, add the Worcestershire sauce, onion, and garlic powders
  10. Pour in the red wine and simmer until it reduces and the mixture starts to thicken
  11. Stir in the beef broth
  12. Allow it to simmer until it thickens
  13. Taste and adjust seasoning
  14. Turn off the heat and stir in the peas
  15. If not using an oven safe skillet, transfer mixture into a baking dish
Potatoes
  1. Peel and dice potatoes
  2. Boil them in salted water until fork tender
  3. Drain and place back into the pot
  4. Put the pot back on the burner with the heat set at low
  5. Mash the potatoes then stir in the butter and cream cheese
  6. Add the heavy cream, garlic powder, and Parmesan cheese
  7. Season to taste with salt
  8. Stir in the egg yolk
  9. Add dollops of the mashed potatoes to the meat mixture and spread it over gently and evenly
  10. Grate more Parmesan on top
  11. Bake on the top rack of the oven for 20-25 mins or until as brown as desired
  12. Allow to rest for 15 mins before serving.
  13. Enjoy!
Coop Can Cook https://coopcancook.com/

The BEST Beef Stew

Beef stew is one of my absolute favorite dishes to prepare! I love everything about the cooking process. The fresh herbs, simplicity of ingredients, and tender beef all make me happy! A lot of love goes into my pot! And I put even more into this recipe! Ready to try the BEST Beef Stew ever??!?

I’m not exaggerating. It really is amazing. I LOVE using a dry, red wine in my stew. I typically use Merlot or Pinot Noir. It really enhances the flavors in the beef. Alcohol cooks out with 20-30 secs, so it’s safe for the kiddies. 

NEVER buy stew meat! I repeat, NEVER BUY STEW MEAT!!! It never gets tender no matter how long you cook it. It’s basically just scrap meat from different parts of the animal that butchers package together and sell. Buy a chuck roast and cut that sucker up! Makes a huge difference!

Happy Cooking,

B. Coop

The Best Beef Stew
Serves 5
Write a review
Print
Prep Time
20 min
Cook Time
2 hr
Total Time
2 hr 20 min
Prep Time
20 min
Cook Time
2 hr
Total Time
2 hr 20 min
Ingredients
  1. 1 chuck roast cut into 1 inch chunks
  2. 2 teaspoons onion and garlic powder each
  3. 1 tablespoon Worcestershire Sauce
  4. 3/4 cup flour
  5. 1/3 cup vegetable oil
  6. 1 yellow onion chopped
  7. 2 teaspoons garlic minced
  8. 2 tablespoons flour
  9. 1 tablespoon tomato paste
  10. 1 cup dry red wine
  11. 4 cups beef broth
  12. 2-3 sprig thyme
  13. 3 potatoes
  14. 2 cups chopped carrots
  15. 1 cup chopped celery stalks
  16. 1 cup frozen peas
  17. seasoned salt and pepper to taste
Instructions
  1. Season the beef with onion and garlic powder, seasoned salt, and Worcestershire sauce.
  2. Toss the meat in 3/4 cup of flour.
  3. Heat the oil in a pot.
  4. Brown meat 1 min per side. Do this in batches so that the meat actually browns and not just steams from overcrowding the pot.
  5. Remove from pot but leave the brown bits that are stuck to the bottom of the pot. **That’s called the “fond” (who knew it had a name??) it’s where all of your flavor comes from. Looks burnt, don’t be alarmed it isn’t.
  6. Now add the onions and minced garlic.
  7. Sauté till translucent.
  8. Sprinkle in 2 tablespoons of flour then stir for a few secs to cook out that flour taste. Add the tomato paste.
  9. Next pour in the red wine. **Don’t worry, the alcohol content of the wine will evaporate after 20-30 secs of cooking. My stew won’t make ya tipsy! However, you can use beef broth instead if you prefer. Only a 1 cup tho, for now.
  10. Allow it to come to a slight boil. This will loosen “the fond”.
  11. Stir until it starts to thicken. Keep the heat at medium.
  12. Add meat back to the pot. (the smell in your kitchen will be amazing at this point, you’re welcome!)
  13. Then, add in the beef broth and thyme sprigs
  14. Cover and allow to simmer for an hour.
  15. Remove thyme stems
  16. Add vegetables of your choice. I use potatoes, carrots, and celery.
  17. Taste and adjust your seasoning if needed.
  18. Cook for another hour or until meat and veggies are fork tender.
  19. If using peas, add them in during the last 10 mins of cooking time if frozen.
  20. Serve over rice or potatoes.
  21. Invite me over for dinner.
Coop Can Cook https://coopcancook.com/

Strawberry Delight

My best friend, Danielle, used to do all of the cooking back in the day. I NEVER cooked. It happened by chance. I just one day decided to put a pot on the stove. Haven’t turned back since! Back to the story. My bad. Danielle made some super bomb desserts! She introduced me to one called Strawberry Delight! And the name fit it perfectly! It instantly became my favorite thing to have her make! And it was extremely easy! I hadn’t made it in years before this Thanksgiving mishap transpired. 

On this past Thanksgiving, I was in the middle of baking pound cakes when I realized I was out of Baker’s Joy! I figured I’d just flour and grease the pan. Big mistake! The damn cake stuck! I mean, it was glued to the pan! That’s what I get for being lazy! I went into panic mode. And that’s how my version of Strawberry Delight was created…

Yeah, it’s definitely not a cute dessert. It looks a mess! But, I promise, no one will care about the looks after tasting this heavenly treat! Danielle’s version used Nilla wafers instead of cake and Cool Whip instead of fresh cream. I had to be extra! And I definitely encourage you too be extra too!

I’ve made this with Cream Cheese Pound Cake and it was great. But, I do prefer using my Easy White Cake recipe http://www.coopcancook.com/easy-white-cake/ in this. I made a few changes to the cake recipe. I used strawberry extract instead of almond. I also used Vanilla Coconut almond milk instead of whole milk. Yummy! So, feel free to play around with the flavors. 

Happy Cooking,

B. Coop

Strawberry Delight
Serves 8
Write a review
Print
Ingredients
  1. 1 13x9 white cake cut into cubes (Use my Easy White Cake recipe)
  2. 8 oz cream cheese (soften; don't you put it in the microwave! Let it sit out at room temp.)
  3. 15 oz container frozen, sweetened, sliced strawberries
  4. 2 tsp pure vanilla extract
  5. 14 oz can sweetened condensed milk
  6. 1 pint heavy whipping cream
  7. 3 T powdered sugar
Instructions
  1. Spread cake cubes into a casserole dish or container
  2. Using an electric mixer, mix 4 oz of the cream cheese until smooth
  3. Pour in the condensed milk and mix well
  4. Add in the juice from the strawberries and 1 tsp of vanilla extract
  5. Mix until combined.
  6. Fold in the strawberries.
  7. Pour mixture evenly over the cake
  8. Now, mix the remaining half of cream cheese until smooth
  9. Slowly pour in the heavy cream and mix for 30 secs
  10. Add in the powdered sugar and vanilla.
  11. Whisk until stiff peaks form; about 2 minutes.
  12. Spread cream evenly over the crumbled cake mixture
  13. Cover dish with plastic wrap and refrigerate for 1 hour or until ready to serve.
  14. Enjoy!
Coop Can Cook https://coopcancook.com/

Cajun Roasted Chicken

This past Thanksgiving, my 16 year old cousin did the turkey. It was the best turkey I have ever had! Juicy, moist, and flavorful! No knife needed. We tore into that thing with forks! She made me so proud! She gave me a great tip that I’ll be sharing with you guys. Instead of using a turkey, I’m going to show you how to roast the absolute best whole chicken ever!! Cajun style of course!

The tip my cousin, A’Reya, gave me was to soak the Trinity (onions, bell peppers, and celery) in the marinade before stuffing it into the cavity. This produces a very flavorful bird! It also prevents you from having to use other spices to season the cavity. All of the flavor will be there from the marinaded veggies. The kid is a genius!

I use Cajun Butter marinade. It’s the bomb! One stop shop. So much flavor! Don’t worry if you can’t find it in stores. I’ve included my homemade version below. Just get a meat injector and load that baby up!

I marinated my chicken, Chuck, for 24 hours. But, you could honestly get away with just 4 hours. It’s also extremely important that you allow the chicken (or any meat) to come to room temperature before roasting. If not, you’ll “shock” the meat and it won’t be as moist and tender as you’d like.

I like to cover the chicken with foil during the first hour of roasting. This will allow the bird to steam a bit and lock in the moisture. I remove the foil, and continue roasting for the last 30 mins. This will give it a chance to brown and crisp the skin. 

Happy Cooking,

B. Coop

Cajun Roasted Chicken

Ingredients

Chicken:

  • 1 3-5 lb whole chicken
  • 1 bell pepper
  • 1 onion
  • 2 celery stalks
  • 16 ounces Louisiana Cajun Butter marinade or use the homemade marinade recipe below
  • 1-2 T Cajun seasoning
  • 1 T onion powder
  • 1 T garlic powder
  • 2 T Italian seasoning
  • 4 T butter softened

Cajun Butter Marinade:

  • 1 stick salted butter melted
  • 2 T Cajun seasoning
  • 1 T Worcestershire sauce
  • 1 T apple cider vinegar
  • 1 tsp chicken bouillon powder
  • 1 tsp garlic powder
  • 1 tsp onion powder
  • 1/2 tsp Allspice
  • 1/2 tsp dried rosemary

Instructions

Chicken:

  1. Roughly chop the bell pepper, onion , and celery
  2. Pour 1 ounce of the marinade on the veggies and toss to coat; set aside
  3. Clean the whole chicken under cool water (Don't put any soap on that dang bird!)
  4. Remove everything from the cavity and trim all excess fat
  5. Pat the chicken dry very well with paper towels (Don't worry about being cute. Put your hand in that cavity and dry it out, boo.)
  6. Place the bird in a marinating bag (not a Walmart or plastic grocery store bag) or dish
  7. Stuff the marinade covered veggies into the cavity
  8. Load your injector with the marinade and inject each part of the chicken until all (except 1 ounce) of the marinade is used.
  9. Inject the chicken deeply and slowly push the marinade in while pulling the injector out to distribute the marinade evenly. (Wait. That lowkey sounds erotic. Ew. Sorry.)
  10. Take the remaining 1 ounce of marinade and rub it generously over the entire chicken.
  11. Mix 1 T of Italian seasoning and butter
  12. Rub the butter mixture under the skin on the breasts of the chicken
  13. Sprinkle the Cajun seasoning, the rest of the Italian seasoning, onion and garlic powders all over the chicken and rub it in gently.
  14. Tie the bag or cover the chicken and refrigerate for at least 4 hrs.
  15. Take the chicken out of the fridge and allow it to come to room temperature for about 30 mins.
  16. Preheat oven to 375 degrees F
  17. Place the chicken in a roasting pan and cover the pan with foil tightly.
  18. Bake for 45 mins.
  19. Remove the foil and baste the chicken
  20. Continue to bake for another 45 mins or until the internal temp of the chicken thigh reaches 170 degrees and juices run clear.
  21. Baste the chicken again and return it to the oven until the skin is a crispy as you'd like.
  22. Remove the chicken from the oven and over it with foil
  23. Allow chicken to rest for 10 mins before slicing.
  24. Enjoy!

Cajun Butter Marinade:

  1. Melt butter in a saucepan and whisk all remaining ingredients in.
  2. Allow mixture to simmer for 5 mins.
  3. Remove from heat and allow to cool for 10 mins.
  4. Get to injecting!

Recipe Notes

NOTE: This is a updated recipe. The steps will differ from those taken in the tutorial. Refrigerate any leftover marinade. Homemade marinade is good for one week.

Baked Mac and Cheese

The Great Mac & Cheese debate has worked my dang nerves! “I like it dry!” “Creamy!” “American cheese has to be in it!” “No processed cheese!!” If y’all don’t sit down somewhere! Goodness! It’s MACARONI AND CHEESE! I understand that everyone has their individual tastes. But, you’ll never know what you like if you only try it one way. I make this stuff all kinds of different ways, using all kinds of different cheeses! However, I tried my BEST to come up with a Baked Mac and Cheese recipe that would meet in the middle. And, I really believe this recipe will please even the pickiest of eaters. I PRAY!

As stated above, everyone has their own preference of cheeses to use. And you are free to use whatever floats your cheesy boat. That line was cheesy, Coop. Whatever. My only pet peeve with cheese is using that pre-packaged cheese! No shade, but SHADE! Go to the deli, buy a small block of cheese, and shred that bad boy yourself. I know it’s time consuming. But, it makes a huge difference in the flavor and quality of your mac and cheese!

Now, let’s talk baking time. If you prefer a drier, browner mac and cheese, then jack the heat up to 400 degrees F. Or you can just leave it in the oven for a longer time than I did. My recipe will yield a pan of mac and cheese that’s stiff and slightly browned on the top with a creamy, bubbly center. So, just adjust it to your preference, babe!

That’s enough chit chat. The reason you’re really here is below.

Happy Cooking!

B. Coop

Baked Mac and Cheese
Serves 10
Write a review
Print
Prep Time
20 min
Cook Time
25 min
Total Time
55 min
Prep Time
20 min
Cook Time
25 min
Total Time
55 min
Ingredients
  1. 1 lb elbow macaroni
  2. 3 T butter
  3. 2 tsp onion powder
  4. 2 T flour
  5. 2 1/2 cup half and half
  6. 1 cup evaporated milk (not condensed milk, baby! EVAPORATED!)
  7. 4 oz cream cheese (softened)
  8. 1 cup Muenster cheese (shredded)
  9. 1 cup Sharp Cheddar (shredded)
  10. 1 cup Mozzarella (shredded)
  11. 1 T Accent seasoning (This is optional, cause I don't wanna hear nothing about MSG's!)
  12. salt and white pepper to taste
Instructions
  1. Preheat oven to 350 degrees F
  2. Bring a pot of water to a boil.
  3. Add salt and 1 tsp of onion powder into the water.
  4. Stir in the macaroni and cook until al dente. Refer to package instructions for cook time.
  5. Drain (Do NOT rinse with water! I'm not playing!)
  6. Stir in 1 T of butter
  7. In a sauce pan, melt the remaining butter.
  8. Whisk the flour into the butter for 1 minute.
  9. Slowly pour in the half and half while whisking.
  10. Add in cream cheese and stir until it dissolves
  11. Season to taste with salt, white pepper, 1 T Accent seasoning, and 1 tsp of onion powder.
  12. Add in 1/2 cup of each of the shredded cheeses.
  13. Once cheese begins to melt, turn off the heat.
  14. Pour in the macaroni and stir to combine.
  15. Now, pour in the evaporated milk (if you use sweetened condensed milk, I swear we gone fight!)
  16. Taste and adjust seasoning as needed.
  17. Pour the mixture into a buttered casserole dish.
  18. Top with the remaining shredded cheeses evenly.
  19. Bake, uncovered, for 25 mins or until as brown as desired.
  20. Allow it to rest of 10 mins (or you'll burn the entire hell out of the roof of your mouth!)
  21. Enjoy!
Coop Can Cook https://coopcancook.com/

Southern Cornbread Dressing & Turkey Gravy Recipe

When it comes to homemade dressing, my mother is Beyoncé. No, seriously. Everyone who has ever tasted her dressing falls in love. So, when the Cookies asked for a Southern Cornbread Dressing recipe I got nervous instantly! Like come on! How am I gonna top Beyoncé‘s recipe? Like how?? Then, I remembered. Coop is Beyoncé‘s child. I can do this! So, I said a quick prayer then proceeded to try to take my own mother’s crown. All’s fair in family and the kitchen! Let me tell you, there was no greater reward than watching the Beyoncé of Dressings go back for a second helping of MY dressing! *insert praise dance* Cookies, my mama loved my dressing! Look at God!! And since you guys are my homies, I’m sharing the goodness with you!

The flavor turkey necks provide the dressing is unmatched. Chicken is great, don’t get me wrong. But, it’s just something special about well-seasoned turkey neck meat in a dressing! And the stock it leaves? Chile, goooood eating! Beyonce (my mother) adds a little bit of chicken liver or gizzards to hers. That adds even more flavor. If you like that slightly strong taste of chicken liver, try it!

The herb stuffing mix that I use a contains sage. Since, sage can be overpowering if used in excess, I don’t add any additional pinches to this recipe. But, please your own taste buds. Season however you’d like. BUT, do not start seasoning your dressing until the bread has had time to soak until that stock. You don’t make it too salty.

Also, it’s important to not overcrowd your baking pan with the dressing. I try not to allow it to fill the pan over 1 1/2 inches in height. If that happens, it will brown too much on the top and bottom while remaining mushy inside. So, if you have too much dressing for your pan, just put half of the mixture in one pan and the rest in another. Watch it while baking and remove it when it gets as dry as you like.

And the cornbread! DO NOT USE SWEET CORNBREAD! Use the same recipe I used in my Seafood Cornbread Dressing http://www.coopcancook.com/seafood-dressing/  Put that box of Jiffy down! I mean it. My mom adds about 1 cup of cooked rice to her dressing to make it rice dressing. Delicious! If you like rice dressing, just stir it into the bowl before pouring into the baking dish. Make sure you taste everything and get that flavor perfect!

I’ve also included an easy recipe for making Turkey dressing from scratch. I use the same stock I made for the dressing with the turkey necks. Just reserve 2 cups of the stock for the gravy.

Happy Cooking,

B. Coop

Southern Cornbread Dressing
Serves 8
Write a review
Print
Prep Time
1 hr
Cook Time
1 hr 20 min
Total Time
2 hr 20 min
Prep Time
1 hr
Cook Time
1 hr 20 min
Total Time
2 hr 20 min
Cornbread
  1. 1 cup self rising flour
  2. 1 cup yellow cornmeal
  3. 1/3 cup vegetable oil
  4. 1 cup milk
  5. 1 large egg
  6. pinch of salt
  7. 1 tsp granulated sugar
Dressing
  1. 1 lb turkey necks or chicken thighs (bone in)
  2. 1 pan Cornbread (crumbled)
  3. 1/2 of a 14 oz bag of classic herb stuffing mix (Pepperidge Farm brand)
  4. 1 onion
  5. 1 bell pepper
  6. 2 celery stalks
  7. 1 T minced garlic
  8. 1 stick butter
  9. 6 cups water
  10. 1 T onion powder
  11. 1 T garlic powder
  12. Cajun seasoning (or salt) & black pepper to taste
Turkey Gravy
  1. 2 cups stock from turkey necks
  2. 4 TBS butter
  3. 3 TBS flour
  4. 1 tsp onion powder
  5. salt and pepper to taste
Cornbread
  1. Preheat oven 400 degrees F
  2. Mix all ingredients together well.
  3. Pour into a greased 9 inch pan or cast iron skillet
  4. Bake for 20-25 mins. or until a toothpick inserted in the center comes out clean.
Dressing
  1. Season turkey necks or chicken thighs with seasoned salt, onion powder, and garlic powder.
  2. Place them in a stock pot or dutch oven. (Chile, just get a big pot)
  3. Roughly chop half of the onion, bell pepper, and celery.
  4. Add it to the pot with the meat and add the water.
  5. Bring it to a boil, reduce the heat, cover, and simmer until meat is tender and cooked completely.
  6. Remove the meat. Once it cools, separate the meat from the bone, and set it aside.
  7. Strain the stock and reserve. Discard the veggies.
  8. Preheat oven to 350 degrees F
  9. Finely chop the remaining onion, bell pepper, garlic, and celery. Use a food processor if you have one available.
  10. In a pan or skillet, saute veggies the butter until tender.
  11. In a large bowl, add the crumbled cornbread, herb stuffing mix, veggies, onion & garlic powders, meat, and 4 cups of the stock.
  12. Mix well, taste, and adjust seasoning if needed.
  13. Pour mixture into 1 (or 2)* buttered 9x13 casserole dish.
  14. Bake, uncovered, for 40 mins to an 1 hour or until it's as dry as you'd like.**
  15. Allow to cool for 10 mins.
  16. Enjoy!
Turkey Gravy
  1. Melt butter in a heavy bottom saucepan
  2. Whisk in the flour
  3. Continue whisking on medium high heat until the roux is a light brown color
  4. Pour in the stock while whisking
  5. Continue whisking until the gravy thickens
  6. Remove from heat
  7. Stir in the onion powder
  8. Season with salt and pepper to taste
  9. Drizzle over the dressing
  10. Enjoy!
Notes
  1. *If the dressing is thicker than 2 inches in your pan, remove some of it, and bake it in another pan. Use 2 pans instead of one to ensure even baking.
  2. **Check the dressing after the first 30 mins of baking. If it is browning too fast and still "jiggly" in the center when the pan is shaken, place it on the top rack of the oven and continue baking.
Coop Can Cook https://coopcancook.com/

Creamy Pastalaya

I don’t know what it is about cooler weather and Halloween that makes me want Pastalaya. It’s just what I like to eat while watching “Hocus Pocus”. I know I’m not the only one that gets seasonal cravings! If you’ve never heard of Pastalaya, it’s basically Jambalaya with pasta instead of rice. It’s delicious! I love it creamy, so I add a little extra cream. AND it’s a One-Pot dish! You know that’s right up my lazy cooking alley!

Easy, right? And let me tell you! The smell will send your neighbors over to pretend like they need to borrow something. Knowing doggone well they’re just praying that you offer them a plate! Just a warning. This recipe stretches pretty well though. You’ll have some to share.


Traditional Pastalaya doesn’t contain cheese. But, I can’t have pasta without a little cheese. But, it’s optional! You can also switch up the cheese. Use whatever you like. Or don’t use it at all. The flavors from the pepper, onions, seasoning, and sausage are more than enough to make this one of your new favorites!

Happy Cooking,

B. Coop

Creamy Pastalaya
Serves 8
Write a review
Print
Prep Time
10 min
Cook Time
20 min
Total Time
30 min
Prep Time
10 min
Cook Time
20 min
Total Time
30 min
Ingredients
  1. 1lb sausage
  2. 1 lb shrimp
  3. 1/2 lb chicken breast (chopped)
  4. 1 green bell pepper
  5. 1 red bell pepper
  6. 1 onion
  7. 3-4 green onions
  8. 2 T minced garlic
  9. 1 T olive oil
  10. 1 T butter
  11. 1 lb penne (uncooked)
  12. 2 cup chicken broth
  13. 1 can rotel or diced tomatoes (drained)
  14. 1 tsp liquid crab boil
  15. 1 T onion powder
  16. 1 T garlic powder
  17. 1 T cajun seasoning
  18. 1 tsp thyme
  19. 1 T parsley
  20. 1 tsp Worcestershire sauce
  21. 1/2 cup heavy cream
  22. 1 cup shredded parmesan or fontina cheese
  23. green onions to garnish
Instructions
  1. In a large pot or Dutch oven, heat olive oil
  2. Add in sliced sausage and cook until browned; remove
  3. Toss shrimp in liquid crab boil
  4. Add shrimp to the pot and cook in the sausage grease until they blush; remove
  5. Season the chicken with onion & garlic powder then add to the pot
  6. Cook chicken completely; remove
  7. Diced the onions, green onions, and bell peppers.
  8. Add them to the pot and saute until tender
  9. Then add the garlic and saute for 30 secs.
  10. Pour in the tomatoes.
  11. Add the sausage, chicken, broth, thyme, parsley, cajun seasoning, and Worcestershire sauce.
  12. Bring to a boil
  13. Add in the pasta and stir.
  14. Cover and cook on low for 10 mins
  15. Uncover, stir, and continue cooking until pasta is tender.
  16. Pour in the heavy cream and stir.
  17. Taste and adjust seasoning if needed.
  18. Add in the cheese and stir until melted.
  19. Garnish with green onions and serve.
  20. Enjoy!
Coop Can Cook https://coopcancook.com/

Seafood Cornbread Dressing

It’s that time of the year again!!! Thanksgiving is approaching. I’ve read ALL of your emails and I shall deliver the goods! My Cookies want Thanksgiving food and I’m gonna give Thanksgiving food! Starting with the most requested dish….Seafood dressing!

Cookies, DO NOT USE JIFFY CORNBREAD IN MY DRESSING! I have absolutely nothing against Jiffy. In fact, don’t even use my Sweet Cornbread recipe for this. It’s entirely too sweet for dressing. Use the one I provide in this recipe. I also do not use Sage. However, if you want to add it, it’s your pan of dressing, babe. Personalize it to your taste!

I also prefer a drier dressing. I don’t like it mushy. So, if it’s too dry for your taste, add more broth one 1/2 cup at a time until it’s the texture you desire. I’m only using shrimp and crab meat. You may add crawfish, fish, lobster, etc. Again, this is your dressing. So, make it yours!

I know some of you want a traditional dressing as well. And we’ll do that at a later date. However, it’s not much difference from the way I prepare this seafood version. In regular dressing, I season and boil turkey necks until the meat practicing falls off the bone. That’s what I use as the meat in my dressing along with a few ground up chicken livers.No cream of anythings either. Just stock. And I also add a cup or 2 of cooked, white rice. Follow the same method used in seafood dressing minus the seafood. And there ya have it!

Happy Cooking,

B. Coop

Seafood Cornbread Dressing
Serves 8
Write a review
Print
Prep Time
20 min
Cook Time
40 min
Total Time
1 hr
Prep Time
20 min
Cook Time
40 min
Total Time
1 hr
Cornbread
  1. 1 cup all purpose flour
  2. 1 cup yellow cornmeal
  3. 1/3 cup vegetable oil
  4. 1 cup milk
  5. 1 large egg
  6. pinch of salt
  7. 1 tsp granulated sugar
Dressing
  1. 1 pan Cornbread (crumbled)
  2. 1/2 of a 14 oz bag of classic herb stuffing mix (Pepperidge Farm brand)
  3. 1 lb shrimp (roughly chopped)
  4. 1/2 lb jumbo lump crab meat (if you love me, you won't buy that imitation crab for my recipe)
  5. 1 onion
  6. 1 bell pepper
  7. 2 celery stalks
  8. 1 T minced garlic
  9. 4 T melted butter
  10. 1 10 1/2 oz can Cream of Shrimp
  11. 2 cups chicken broth
  12. 1 T liquid crab boil
  13. 1 T onion powder
  14. 1 T garlic powder
  15. Cajun seasoning & black pepper to taste
Cornbread
  1. Preheat oven 400 degrees F
  2. Mix all ingredients together well.
  3. Pour into a greased 9 inch pan or cast iron skillet
  4. Bake for 20-25 mins. or until a toothpick inserted in the center comes out clean.
Dressing
  1. Preheat oven to 350 degrees F
  2. Finely chop onion, bell pepper, green onions, garlic, and celery. Use a food processor if you have one available.
  3. In a pan or skillet, saute veggies in 2 T of butter until tender.
  4. Add in the cream of shrimp and stir until heated
  5. Mix in the crab meat, seasoning, and liquid crab boil
  6. In a large bowl, add the crumbled cornbread, herb stuffing mix, and cream mixture.
  7. Add in remaining melted butter and broth.
  8. Mix well, taste, and adjust seasoning if needed.
  9. Fold in the raw shrimp.
  10. Pour mixture into a buttered 9x13 casserole dish.
  11. Increase oven temp to 375 degrees F
  12. Cover with foil and bake for 30 mins.
  13. Uncover and continue to bake for an additional 5-10 mins or until as brown as desired.
  14. Allow to cool for 10 mins.
  15. Enjoy!
Coop Can Cook https://coopcancook.com/

7 Up Pound Cake

I have a list of recipes I think every Southern cook should master. 7 Up Pound Cake is definitely at the top of that list. The ingredients are few and the method is a breeze. You’ll have this recipe committed to memory in no time. After you make it once, everyone will be begging you to make it again! AND again. 

One of the most important steps in baking is having the ingredients all set at room temperature. Why? Because ingredients at room temperature emulsify easily which, in turn, traps air. Trapping the air ensure that we get a smooth textured batter. And the end result? Hole free, fluffy cake! So, take your milk and eggs out of the fridge about an hour before use. And give your butter about 2 hours sitting out so that it’s nice and soft.  Blending hard butter is the blues! So, don’t think you’re gonna get away with skipping that part! You’ll have butter stuck to your forehead if you turn that mixer on hard butter. Oh and DO NOT attempt to soften butter in the microwave! We want softened butter. Not melted butter.

Another important part of the baking process is “creaming”. You want to take your time and mix the butter and sugar until it’s light and creamy. This can take up to 10 mins at times. I always cream the butter and sugar together using my electric mixer for 7 mins. I know that make seem excessive, but doing this will give us a fluffy cake every time! It’s well worth the tired wrist! If you do a lot of baking, a stand mixer is a great investment. Honey, it’s kitchen life changing!

I’m also using butter extract in this recipe. I love a buttery, moist pound cake! And this is exactly what this recipe renders. If you’d like a more “gooey” texture, just use 2 sticks of butter and 1/2 cup of butter flavored shortening instead of the 3 sticks of butter. If you don’t like lemony cake, leave out the lemon extract. Don’t skip the zest though. It really adds a freshness and flavor boost.

The glaze is my favorite part. Probably because it’s the easiest. You know I’m the lazy baker. Anyway, just put all of the ingredients in a bowl, whisk it well, wait until the cake is completely cool, and drizzle it over. Done!

P.S. I still hate baking.

Happy Baking,

B. Coop

7 Up Cake
Write a review
Print
Prep Time
20 min
Cook Time
1 hr 15 min
Total Time
1 hr 35 min
Prep Time
20 min
Cook Time
1 hr 15 min
Total Time
1 hr 35 min
Ingredients
  1. 3 cups granulated sugar (Yes, 3 cups. Don't question my measurements in the comments. I got this.)
  2. 3 sticks unsalted butter, room temperature
  3. 5 eggs, room temperature
  4. 3 cups cake flour or all purpose flour, sifted
  5. 1 cup 7 up soda, room temperature
  6. 1 tsp butter extract
  7. 1 tsp lemon extract
  8. 1 tsp vanilla extract (pure, good quality)
  9. 1/2 tsp salt
  10. zest of one lemon
Glaze
  1. 1 cup powdered sugar
  2. 2 T 7 up
  3. 1 tsp butter extract
Instructions
  1. Preheat oven to 325 degrees F
  2. Grease Bundt pan with Baker's Joy or flour and butter. Set aside.
  3. Using a stand or electric mixer, cream butter and sugar together for 5-7 mins. (I know that's a long time. But, it's necessary. Trust me. Tag in a partner for help when your arm gives out.)
  4. Add in the eggs one at a time, mixing to combine in between each egg.
  5. Now, add the extracts and lemon zest
  6. Scrap down the mixing bowl with a spoon and spatula as needed.
  7. Mix the salt with the flour and add in half of that mixture.
  8. Pour in half of the 7 up. Mix. Then, add in the remaining flour and 7 up.
  9. Mix until combined and fluffy.
  10. Spoon batter into Bundt pan and bake for 1 hour and 15 mins or until a toothpick inserted in the center of the cake comes out clean.
  11. Allow cake to cool in the pan for 10-15 mins.
  12. Flip cake over onto cake plate or cooling rack and allow to cool completely.
Glaze
  1. Whisk all ingredients together in a bowl.
  2. Drizzle over cake.
  3. Enjoy!
Coop Can Cook https://coopcancook.com/

Oven Baked BBQ Ribs

Oven Baked BBQ Ribs. Claude hammercy! Just typing those words make me hungry!! I love BBQ. And my dad is the BBQ king! I know. Everyone thinks their father or uncle is the best. But, I’m telling the truth. The man has skills on the grill! Unfortunately, I know nothing about handling the pit. I’d definitely be the fool who loses her eyebrows trying to fire up the grill! So, i’ll just stick to the oven for now.

Super tender and flavorful ribs CAN be done in the oven. Do not let anyone tell you otherwise! It just takes the proper preparation and time. Low and slow! Keep the oven heat low and slow cook these bad boys! If you desire that smokey, grill taste, just add in a little Liquid Smoke. And BAM! You’ve got some bomb ribs AND you get to keep your eyebrows! Ain’t God good???


In addition to cooking the ribs low and slow, I feel that removing the membrane is important in ensuring that the meat falls off the bone. It also prevents the rub from penetrating the meat. Under the ribs, there is a slick, stretchy, clear membrane that you peel off the back. Make sure to have a pairing knife and a paper towel handy. These will help you remove that membrane with ease. Beef ribs actually have two layers of membranes. If you can get both off, great. If not, don’t worry about it. That second layer is a jerk and can be difficult to remove. Just focus on taking the first layer off. No, this step is not mandatory, but the does make a difference.

Another helpful tip is apple cider vinegar. I don’t use this for my beef ribs, but I find that it works well with pork ribs. The acidity of the vinegar aids in tenderizing the meat. Just sprinkle 1 tablespoon of apple cider vinegar per 3 pounds of ribs onto the meat after applying the rub. 

Okay, so, the sauce. I went the quick route this time and used store bought sauce. HOWEVER, y’all already know I had to jazz it up a bit! My parents have never just used bbq sauce straight from the bottle. They have always added a little brown sugar, honey, etc. So, that’s what I do. I just buy whatever BBQ sauce that’s on sale and add whatever’s on my heart that day to it. I mainly use brown sugar, honey, and Coke. But, on the times when I’m feeling extra, I add pineapple juice or Bourbon or Hennessy. Freestyle it!  I don’t have measurements for this, because I don’t know what kind of sauce you’ll find on sale. I’ll give you a homemade BBQ sauce if you guys want it one day.

Happy Cooking,

B. Coop

Oven Baked BBQ Ribs
Write a review
Print
Prep Time
1 hr
Cook Time
4 hr
Total Time
5 hr
Prep Time
1 hr
Cook Time
4 hr
Total Time
5 hr
Ingredients
  1. 3 lbs beef or pork ribs (I use beef, but do your thing. No judgement)
  2. 4 T olive or canola oil
  3. 1/4 cup brown sugar (light or dark)
  4. 2 T Worcestershire sauce
  5. 1-2 T seasoned salt or cajun seasoning (Y'all already know which one I picked)
  6. 1 T onion powder
  7. 1 T garlic powder
  8. 1 T black pepper
  9. 1/2 tsp cumin
  10. 1 tsp smoked paprika
  11. BBQ Sauce to taste
Instructions
  1. Rinse the ribs with water and pat them dry with a paper towel
  2. Remove the membrane.*
  3. In a small bowl, combine the oil, brown sugar, Worcestershire sauce, and all spices. This is the "rub".
  4. Mix well.
  5. In a larger bowl or plastic, ziplock bag, pour the rub over the ribs and massage it into the ribs well. (Massaging ribs was uncomfortable to type. I know, I'm childish. Continue.)
  6. Cover the bowl or seal the bag and refrigerate for at least 1 hour or overnight.
  7. After marinating the ribs, preheat the oven to 250 degree F.
  8. Line a baking sheet with foil and place the ribs in a single layer on top of the foil.
  9. Wrap the ribs tightly in the foil. (Use heavy duty foil. Don't get that cheap foil that tears while you're getting it from the roll. Y'all know what I'm talking about. Put it back!)
  10. Bake the ribs for 3 hours. (Don't go check after the 1st hour when it starts smelling all good. Be patient! Go sit back down.)
  11. Check the ribs. If they are not fork tender, cover them back up, and continue baking for another 30 mins to an hour.
  12. Drain off the excess fat and add the BBQ sauce. (Don't ask me how much sauce. Don't do it. Use as much or as little as you'd like)
  13. Finally, turn your oven on (LOW) broil and broil them for 3 mins or until the sauce sticks to the ribs. ( Do NOT leave the oven. Watch the ribs! If you burn em up, that's your fault!)
  14. Break out the napkins and enjoy!
Notes
  1. *The membrane is a slick, stretchy, clear thingy on the back of the ribs. Use a sharp knife to lift it up and peel it off. Use a paper towel to help you grab it.
Coop Can Cook https://coopcancook.com/