Garlic Butter Steak Tips and Potato Packets

Hey my Cookies! I have some exciting news to share. I am a 2021 Brand Ambassador for Reynolds Wrap® Foil and I am thrilled! Why? For years, Reynolds Wrap® has been the only foilof its kind that my family has used and trusted. You know how much I love simple cooking and easy cleanup after prepping food. Reynolds Wrap® Heavy Duty Foil makes cleanup a breeze! It’s also super durable and safe to use with heavier foods without worrying about it breaking or tearing. This makes Reynolds Wrap® Heavy Duty Foil  perfect for cooking  my Garlic Butter Steak Tips and Potato Packets recipe! 

Steak:

My local butcher shop has these amazing filet tips that are perfect for this recipe. If you can’t find that specific cut of beef, no worries. Just use sirloin steak or beef tenderloin. The size of the cuts of beef will vary:

For well done steak: Cut the steak into 2 inch pieces. 

For medium steak: Cut the steak into 3-4 inch pieces. 

For rare steak: Cut the steak into 5-6 inch pieces

Potatoes:

I prefer to use buttery, Yukon gold potatoes. They pair perfectly with the meat and garlic. Chop them into quarters for even cooking. Don’t even bother peeling off the skin. There’s a lot of flavor there!

You’ll also want to parboil the potatoes. This will ensure that they cook on cue with the steaks. Just a quick 4-5 minute boil in salted water will do. 

Let’s Talk Seasoning:

You know how I feel about flavor! We need it. I believe that placing onions and bell peppers at the bottom of our foil packs will render the best flavor! When heated, the aroma from the veggies will release  into the meat and potatoes. Flavor overload! Use any color of bell peppers you’d like. I love using green and red bell peppers for this recipe.

Grill or Bake:

For this recipe, I always opt to grill my Garlic Butter Steak Tips and Potato Packets. There’s just something about that charcoal flavor on my steak that makes me drool! However, an oven will work as well. Reynolds Wrap® Heavy Duty Foil is high quality and is safe to use in an oven or on the grill. So, the choice of cooking method is all yours!

I prefer a little char to my steaks. So, during the last 4-5 minutes of grilling, I leave the pack open at the top to crisp up the edges of the steak tips a bit. Warning: the smell will make you want to eat them immediately! Don’t do it. Be patient. 

Safety:

When handling your l packets, please use care. They  will be extremely hot to touch. Use tongs or heat resistant gloves to remove them from the grill or oven. Use caution when opening the packets, too. There will be lots of heat and steam released. Keep your face and skin away for protection. 

Happy Cooking,

B. Coop

Garlic Butter Steak Tips and Potato Packets

Easy and flavorful steak and potatoes packet recipe made using durable Reynolds Wrap® Heavy Duty Foil. These packs can be prepared on a grill or in the oven. Cleanup is a breeze!
Prep Time 20 minutes
Cook Time 25 minutes
Total Time 45 minutes
Servings 4 packets

Ingredients

  • 2 lbs filet tips top sirloin, or beef tenderloin (cut into desired-sized pieces; see notes above)
  • 1 TBS Worcestershire sauce
  • 1 lb Yukon gold potatoes quartered
  • 2 TBS olive oil
  • 4 TBS salted butter cubed
  • 1 bell pepper thinly sliced
  • 1 onion thinly sliced
  • 1 TBS minced garlic
  • 1/3 cup fresh parsley chopped
  • 1 TBS Herbes de Provence seasoning
  • 2 tsp onion powder
  • Kosher salt and cracked black pepper to taste
  • Reynolds Wrap® Heavy Duty Foil

Instructions

  1. Cut the steak into the desired serving size.
  2. Toss the steak in the Worcestershire sauce.
  3. Set aside and allow it to come to room temperature.
  4. Bring a pot of salted water to a boil and parboil the potatoes for 4 minutes.
  5. Drain the potatoes and set aside to cool.
  6. Once the potatoes have cooled, add the potatoes and steak into a large mixing bowl.
  7. Season the steak and potatoes with kosher salt and cracked black pepper to taste.
  8. In a small mixing bowl, stir to combine the olive oil, garlic, parsley, onion powder, and Herbes de Provence seasoning.
  9. Pour the olive oil and seasoning blend over the steak and potatoes; toss gently to combine.
  10. Tear off (4) 16” long sheets of Reynolds Wrap® Heavy Duty Foil.
  11. Toss the onions and bell peppers together. Then, add half of the mixture to the center of each sheet of foil..
  12. Separate the steak and potatoes into two servings
  13. Add one serving of the steak and potatoes on top of the onion and peppers per each Reynolds Wrap® Heavy Duty Foil sheet.
  14. Bring up the long sides of the foil, so the ends meet over the food.
  15. Double fold the ends, leaving room for heat to circulate inside.
  16. Double fold the two short ends to seal the packet.
  17. To avoid juices puddling around the food, use a grilling fork to punch 2-3 drainage holes throughout the bottom/sides of the packet.

Grill:

  1. Place the steak and potato packets on a hot grill for 10 minutes.
  2. Carefully open the packet and check the level of doneness using a meat thermometer. Also pierce the potatoes to check tenderness.
  3. If the steak and potatoes are tender and cooked to your liking, carefully slide the packets off the grill using tongs. If not, reseal them and continue grilling until cooked to your liking. OPTIONAL: For more charred steak and potatoes, leave the packet open at the top and continue grilling.
  4. When steak and potatoes are grilled to your liking, remove the packets and allow them to rest closed for 10 minutes before serving.

Oven:

  1. Preheat oven to 450°F.
  2. Bake the packets on a shallow baking sheet.
  3. Bake the packets for 15-20 minutes before carefully checking doneness.
  4. When the steak and potatoes are cooked to your liking, carefully remove the packets from the grill and allow them to rest closed for 10 minutes before serving.
  5. Enjoy!

Recipe Notes

Notes: Handle packs will caution! Steam and juices will be very hot. Carefully open the packets away from your face to release the steam after cooking and before serving.

Pepper Steak Recipe

I heard, or read, you loud and clear. The people want my Pepper Steak Recipe! Well, here it is…

Bell Peppers are one of my favorite veggies. I love that each color has it’s own flavor. I also enjoy how the colors brighten up a dish.

As far as the steak is concerned, you have many options. I’m using sirloin, but top round, flank, flat iron, or even London broil will work. Just  slice it thinly. Pop it in the freezer 30 mins before slicing to make it easier to slice. But, be sure to allow the beef to come to room temp before stir frying it.
Baking soda. Yes, the orange box. This helps tenderize the beef. It’s a lifesaver if you’re on a budget and are using a cheap cut of steak. It is what’s used at most Chinese restaurants.

Serve it over white rice or Jasmine rice and you’ll have an easy, take out quality dinner made right in your own kitchen!

Happy Cooking,

B. Coop

Pepper Steak

Servings 3
Author B. Coop

Ingredients

Steak:

  • 1 1/2 lbs sirloin steak
  • 1 tsp onion powder
  • 1 tsp minced garlic
  • 1 tsp Chinese 5 spice
  • 2 T soy sauce
  • 1 tsp baking soda
  • 1/2 tsp sesame seed oil

Veggies:

  • 2 cups thinly sliced green red, and yellow bell peppers
  • 1 sliced onion
  • pinch of salt

Sauce:

  • 1 cup beef stock
  • 1/4 cup soy sauce
  • 2 tsp sugar
  • 1 tsp ground ginger
  • 1 T cornstarch

Instructions

Steak:

  1. Thinly slice the steak into strips and place it into a bowl.
  2. Add the remaining ingredients to the steak and mix well.
  3. Allow to marinate at room temp. for 20-25 mins.
  4. In a wok or skillet, heat vegetable oil.
  5. Add in the steak and stir fry until cooked to your desire level of doneness.
  6. Remove and set aside.

Veggies:

  1. Add the bell peppers into the wok or skillet.
  2. Sprinkle the salt on top
  3. Saute/stir fry for about 2 mins.
  4. Add in the onions and continue to saute until translucent.

Sauce:

  1. In a small bowl, whisk all sauce ingredients together.
  2. Add the steak back into the skillet along with the veggies
  3. Pour the sauce in.
  4. Stir fry at a medium heat until the sauce thickens.
  5. Taste and adjust seasoning as needed.
  6. Serve over warm, rice
  7. Enjoy!


Marinaded Skirt Steak and Chimichurri Sauce

You know I wouldn’t send you into the summer without a bomb Skirt steak recipe for the grill, right? I work hard choosing and developing flavors for you. Only the best for my Cookies. And when you try this recipe, you’ll know I’m telling you the truth.

Skirt steak is one of my favorite cuts of steak, because the thing can take some marinade. I’m all about flavor, so I loved creating this wet rub for the steaks. Skirt steak is not the tenderest cut. However, when you treat it right, it will melt in your mouth. 

I like to make small “nicks” along the surface of the meat. This helps it soak up all of that marinade better. Be careful not to overdo it or cut through the meat. 

Speaking of overdoing it…do NOT overcook this steak. Skirt steak is not meant to be cooked well done. I don’t believe any steak is, but we won’t go there today. I only cook them for one minute per side. Perfect every time.

Coop, what the hell is Chimichurri Sauce?? Glad you asked. It’s an Argentina condiment that loves to be boo’d up with steak. Especially, Skirt steak. I mean, they were made for each other. It’s also delicious on fish, chicken, and even pasta. It’s makes an amazing pasta salad!

This marinaded skirt steak recipe will be amazing on tacos and nachos as well! Serve it with your favorite sides. Let me know what you plan to do with it!

Happy Cooking,

B. Coop

Marinaded Skirt Steak and Chimichurri Sauce
Serves 4
Write a review
Print
Prep Time
1 hr 30 min
Cook Time
2 min
Total Time
1 hr 32 min
Prep Time
1 hr 30 min
Cook Time
2 min
Total Time
1 hr 32 min
Steak
  1. 2 lbs skirt steak
  2. 2 T olive oil
  3. 1 tsp kosher salt
  4. 1 tsp freshly cracked black pepper
Wet Rub
  1. 1 tsp onion powder
  2. 1 tsp garlic powder
  3. 1/2 tsp ground cumin
  4. 1/2 tsp cayenne pepper
  5. 2 tsp dried oregano
  6. 1/2 tsp red pepper flakes
  7. 1/4 cup balsamic vinegar
  8. 1 T Worcestershire sauce
Chimichurri Sauce
  1. 1 cup fresh Italian parsley (firmly packed)
  2. 1/4 cup fresh cilantro
  3. 1 T red wine or balsamic vinegar
  4. 1 tsp minced garlic
  5. 1 tsp red pepper flakes
  6. 1/4 cup olive oil
  7. salt and pepper to taste
Instructions
  1. Using a pairing knife, make small, shallow cuts into the surface of the steak
  2. Coat the steak with olive oil on both sides.
  3. In a small bowl, mix all of the wet rub ingredients together.
  4. Rub half of the mixture on one side of the steak and the remaining half on the other side.
  5. Place in a zip lock or marinading bag
  6. Refrigerate for at least one hour or overnight.
  7. Remove the steak from the refrigerator and allow it to come to room temp.
  8. Season both sides of the steak with salt and pepper.
  9. Heat a cast iron skillet or stove top grill until it starts to release smoke.
  10. Brush the skillet or grill lightly with olive or vegetable oil
  11. Lay the steak on the skillet or grill and cook 1 minute per side.*
  12. Remove the steak, tent it with aluminum foil, and allow it to rest for 5-10 mins before slicing.
  13. Slice the steak against the grain.
  14. Top with Chimichurri sauce
  15. Enjoy!
Chimichurri Sauce
  1. Place all ingredients (except salt and pepper) into a food processor and pulse until well combined into a paste.
  2. Pour into a bowl and season to taste with the salt and pepper.
  3. Refrigerate for at least 20 mins before serving**
Notes
  1. *Do NOT overcook! This isn't a steak you cook well done. It will turn into a rubber glove.
  2. **Chimichurri sauce will last for up to 2 days in the fridge if stored in a tightly sealed container.
Coop Can Cook https://coopcancook.com/


Pan Seared Steak

Valentine’s Day is approaching. I love showing my Cookies how to create restaurant quality dinners at home for this very occasion. Restaurants everywhere will be jam packed! And I think it’s nicer to celebrate with your loved one in the comfort of your own home anyway. It’s more personal and intimate. And impressive!  You guys have flooded my emails for a steak tutorial that’s beginner friendly. I’m not too good at explaining how I sear steaks in texts. So, per requests, here’s the tutorial:

Okay, “steak trolls”. I prepared this meal for family. My family does NOT LIKE ANY PINK MEAT! I prefer medium rare to medium. But, I have a crowd to please this time around. Forgive me? Cool. I’ll show you some pinkness in another video. I promise.

Preparation: I love preparing steak in a cast iron skillet. Even cooking every time! And to ensure that the steaks cook evenly, I first, allow them to come to room temperature. This is very, very important. You never want to cook a cold steak. Give it about a hour to sit out at room temperature before cooking. Another helpful tip is to preheat you skillet in the oven before heating it on the stove. This will also aid in even heating of the pan.

PUT THE FORK DOWN! Don’t mean to yell, but poking a steak is a no-no. Use tongs. We want to reserve as much of the juices as possible. Especially if you’re preference is Medium- Well to Well. This is why resting the steak before slicing is a vital step. 

Seasoning: Salt and pepper or steak seasoning? I use my homemade steak seasoning. Salt and pepper is perfectly fine and really all a steak needs. But, my family enjoys a little something extra. So, it’s all up to you and your taste buds. 

Up in Smoke!: Prepare for the smoke! Open a window. Turn the fan on. When you’re working with high temps, smoke is unavoidable. Don’t be afraid. It’s what’s to be expected from a good sear. 

Is it Done Yet, Coop??: Touch your steak. It’s okay. It’s not too hot. If you don’t have a meat thermometer, the hand test will be your chart. See my tutorial above for a demonstration. 

WINE: And for the grown folks that are wine-o’s like me, red wine is magically with a good, butter-based steak. I paired my Ribeye with a nice, Malbec. Zinfandel would have been a great accompaniment as well. However, if you’re serving a lean cut of steak like a filet, then Chianti, Pinot Noir, or Merlot would be better. Drink responsibility though, Cookies! 

I hope this was helpful. Special thanks to Outside the Boxx Events, LLC. for providing the beautiful table decor! It was the ideal setting for a romantic dinner for two. Check them out! https://www.facebook.com/outsidetheboxxeventsllc/

Happy Cooking,

B. Coop

Pan Seared Steak
Serves 2
Write a review
Print
Prep Time
15 min
Cook Time
10 min
Total Time
25 min
Prep Time
15 min
Cook Time
10 min
Total Time
25 min
Ingredients
  1. 2 NY strip, Sirloin, or Ribeye steaks
  2. 2-3 cloves garlic
  3. 1 T butter
  4. 2 T canola oil
  5. 1-2 sprigs fresh thyme
  6. 2 sprigs fresh rosemary
  7. Kosher salt and cracked black pepper to taste
Instructions
  1. Heat cast iron skillet in the oven on 420 degrees F for 15 minutes
  2. Allow steak(s) to come to room temperature
  3. Season both sides with salt and pepper
  4. Remove skillet from the oven, pour in oil, and turn the heat to high.
  5. Add in the steak
  6. Sear steak on both sides for 2 mins. per side**
  7. Add in butter, garlic, thyme, and rosemary.
  8. Once butter melts, baste steak with it constantly.
  9. Flip the steak every 1-2 mins until it reaches your desired level of doneness.
  10. Remove steak from pan and allow it to rest for 10-15 mins before slicing.
Coop Can Cook https://coopcancook.com/

Steak and Smoked Gouda Alfredo


I’m playing restaurant wars again. When I can’t figure out what to cook, I think about my favorite dishes at different restaurants. Then, I try to recreate them at home. For my birthday this year, I went to a local restaurant and ordered their Steak and Smoked Gouda Alfredo. It was delicious. It features sirloin on angel hair pasta (my fave!) covered with a smoked Gouda cream sauce. Then, they top it with tomatoes, bacon, green onions, and more Gouda. It’s dreamy. 

I’m not a fan of bacon. Yes, I know. So, I left it out. But, of course, you may add it to yours. Just fry it before making your sauce. Then use the grease to saute the garlic and proceed with the recipe. I also opted for Linguine instead of angel hair. I’m ALWAYS using angel hair, so I decided to give it a break. Just for today though! Angel hair is bae.

As for the steak, I like mine Medium to Medium Well. So, cook yours to your liking. Use the “palm test” to determine how done the steak is while cooking. Think the thickness of the steak in mind as well. I also like to keep the seasoning very simple in this recipe. I didn’t want any rubs to alter the flavors of the pasta too much.

What are some of your favorite restaurant dishes that you’d like to learn how to recreate at home? Let me know in the comments!

Happy Cooking,

B.Coop

Steak and Smoked Gouda Alfredo
Serves 2
Write a review
Print
Prep Time
10 min
Cook Time
20 min
Total Time
30 min
Prep Time
10 min
Cook Time
20 min
Total Time
30 min
Steak
  1. 1-2 NY strip, Sirloin, or Ribeye steaks
  2. 2-3 cloves garlic
  3. 1 T butter
  4. 2 T Olive Oil
  5. 1-2 sprigs fresh thyme
  6. 2 sprigs fresh rosemary
  7. salt and pepper to taste
Alfredo Pasta
  1. 1 lb linguine or pasta of your choice
  2. 1 T butter
  3. 1 T minced garlic
  4. 2 cups heavy cream
  5. 1/3 cup chicken broth
  6. 1 cup shredded Smoked Gouda
  7. salt and pepper to taste
  8. garnish with tomatoes, green onions, and bacon (optional)
Steak
  1. Heat cast iron skillet in the oven on 350 degrees F for 15 minutes
  2. Allow steak(s) to come to room temperature
  3. Season both sides with salt and pepper
  4. Remove skillet from the oven, pour in oil, and turn the heat to high.
  5. Add in the steak
  6. Sear steak on both sides for 3 mins. per side**
  7. Add in butter, garlic, thyme, and rosemary.
  8. Once butter melts, baste steak with it constantly.
  9. Flip the steak every 1-2 mins until it reaches your desired level of doneness.
  10. Remove steak from pan and allow it to rest for 10 mins before slicing.
Sauce
  1. Melt butter in a pan
  2. Add in garlic and saute for 30 secs.
  3. Pour in heavy cream and broth.
  4. Bring to a simmer.
  5. Add in the cheese.
  6. Stir until sauce thickens and cheese melts.
  7. Taste and add salt and pepper as needed.
  8. Prepare pasta according to package directions.
  9. Drain pasta and toss in the sauce.
  10. Divide the steak and top the pasta with it.
  11. Garnish with tomatoes, green onions, and bacon.
  12. Enjoy!
Notes
  1. **if your steak is less than 1 1/2 inch in thickness, brown for 1-2 mins per side
Coop Can Cook https://coopcancook.com/

Hibachi Dinner at Home

One of my goals with this site is to show my Cookies how to make restaurant quality meals in your own kitchen. Call me crazy, but I truly believe anyone can cook with the right guidance. Good food looks intimidating. Especially, when the chefs are flipping eggs in hats, lighting fires, and juggling spatulas! Coop can’t teach you that unfortunately. BUT, I can show you how to make a Hibachi dinner at home that will rival your favorite restaurant!

For me, the highlight of a Hibachi meal is the Yum Yum Sauce! I pour that stuff over the entire plate! It’s surprising that something so good is so easy to make using very few ingredients. Just be sure to make the sauce a day or at least a night in advance to give those flavors time to bloom. 

I’m using a cast iron, two burner griddle for this. I love this thing! It allows me to cook two components of the Hibachi dinner at the same time. Making me feel like a real pro in these streets! But, you certainly don’t need it. You may use separate pans, skillets, woks, or even an electric griddle. No need to purchase extra tools just for this. Use what you have!

I use two types of oils. Vegetable oil and sesame oil. The sesame oil is used mainly for flavor which is why it is added in at the same time as the soy sauce and other flavoring agents. It adds that Hibachi flavor I’m used to from the restaurant. It also has a thicker consistency than other oils. A little goes a long way. We want to use it sparingly, so be sure to stick to my measurements.  If you can’t find the sesame oil, don’t worry. The taste will be perfectly fine without it. And, the vegetable oil is used to coat the cooking surface to prevent sticking and burning, of course.

When it comes to fried rice, I like to have my rice cooked and chilled in the fridge a day before cooking. But, Hibachi rice is a little less demanding. You never want to cook your rice and then immediately use it for these type of recipes though. I like to cook the rice a couple of hours before using it to allow it to cool some. This prevents it from getting mushy and overcooked. I only use eggs and sweet onions in my Hibachi rice, because that is the way it is prepared at my favorite, local Japanese restaurant. But, feel free to add peas and carrots to your liking.

Hibachi veggies! Use your faves! I kept it simple and just used sweet onions and zucchini in this recipe. But, I have used broccoli, carrots, and mushrooms as well. Customize your Hibachi dinner to you and your family’s taste.

As for the protein, I only used steak and shrimp in the video. However, I do provide you with the steps for chicken as well. Hibachi is fairly simple cooking. The same cooking method is basically used for all of the protein. The cooking time is really the only variable.

I’m able to find garlic butter in my local supermarket. But, if it’s hard to come by in your area, I gotcha covered! Garlic Butter is very easy to make at home as well. And it really takes the flavors of the Hibachi meal up a few notches! The recipe is below. 

Hope my recipe is helpful and encouraging enough for you to try this dinner idea for your family! It’s very fun and not as complicated as it looks! 

Happy Cooking,

B. Coop

Hibachi Dinner at Home
Serves 2
Write a review
Print
Prep Time
20 min
Cook Time
30 min
Total Time
50 min
Prep Time
20 min
Cook Time
30 min
Total Time
50 min
Yum Yum Sauce
  1. 1 1/4 cup mayo
  2. 1 tsp granulated sugar
  3. 1/2 tsp garlic powder
  4. 1/4 tsp paprika
  5. 1 T melted butter (unsalted)
  6. 1 tsp tomato paste
  7. 1/2 tsp cayenne pepper
  8. 2-3 T water
Ginger Sauce
  1. 1/2 onion (chopped)
  2. 2 T lemon juice
  3. 1 T grated ginger
  4. 1 tsp minced garlic
  5. 1/4 cup soy sauce
  6. 1/2 tsp white vinegar
  7. 1/4 tsp sugar
Hibachi Rice
  1. 2 cups cold, cooked rice (white rice)
  2. 1 T sesame oil
  3. 2 T butter
  4. 2 T soy sauce
  5. 1/2 sweet onion (chopped)
  6. 1 large egg
  7. chopped green onions
Hibachi Noodles
  1. 1/2 lb or 6 oz noodles (Udon, Rice, Ramen, or Linguine)
  2. 2 tsp sesame seed oil
  3. 1 T garlic butter
  4. 2 T soy sauce
  5. 1 T teriyaki sauce
  6. Optional: 3-4 green onions (chopped, both the white part and green part, separated)
Hibachi Vegetables
  1. 1 large zucchini (quartered)
  2. 1 sweet onion (chopped)
  3. 1 T vegetable or canola oil**
  4. 1 tsp sesame oil
  5. 1 T soy sauce
  6. 1 T garlic butter
  7. pinch of salt
Hibachi Steak and/or Chicken
  1. 1 pound of chicken breast and/or sirloin steak (cut in bite sized pieces)
  2. 1 T vegetable or canola oil**
  3. 1 tsp sesame oil
  4. 2 T garlic butter
  5. 2 T soy sauce
  6. 1 T teriyaki sauce
  7. salt and pepper to taste
Hibachi Shrimp
  1. 1 lb raw shrimp
  2. 1 T vegetable or canola oil**
  3. 2 T garlic butter
  4. 1 T soy sauce
  5. 1 T teriyaki sauce
  6. lemon juice (optional)
Garlic Butter
  1. 1 stick unsalted butter (softened at room temp)
  2. 1 T minced garlic
  3. 1 tsp chopped parsley
  4. 1/2 tsp black pepper
  5. 1/2 tsp Italian seasoning
Yum Yum Sauce
  1. (Make 1 day before serving.)
  2. Mix all ingredients (except water) together well.
  3. Add 1-2 T of water to reach your desired sauce consistency.
  4. Chill overnight in the refrigerator.
  5. Serve at room temperature.
Ginger Sauce
  1. Blend all ingredients in a food processor or blender.
  2. Refrigerate until ready to use.
Hibachi Rice
  1. Heat oils in a wok or skillet.
  2. Add onion and saute for 1-2 mins
  3. Add in the egg and lightly scramble it.
  4. Once egg is nearly cooked, add in the cold rice, butter, and soy sauce.
  5. Toss rice and egg together until rice is warm and eggs are cooked completely.
  6. Salt and pepper to taste if needed.
  7. Add chopped green onions.
  8. Remove from pan and serve.
Hibachi Noodles
  1. Cook noodles according to package instructions and drain well.
  2. Heat oil
  3. Add in the remaining ingredients except for the green part of the green onions
  4. Toss to combine.
  5. Once noodles are very coated and hot, add in the green onions
  6. Adjust seasoning to your liking if needed.
  7. Serve.
Hibachi Veggies
  1. Heat oils into the wok or skillet at medium high heat
  2. Add in the zucchini, soy sauce, butter, and a pinch of water.
  3. Saute for 5 minutes
  4. Add in onion and continue to saute until all veggies are tender.
  5. Serve.
Steak
  1. Heat veggie oil in a skillet at medium high heat
  2. Add in the steak and sprinkle on the salt and pepper.
  3. Saute steak.
  4. Once steak begins to brown, add in the remaining ingredients.
  5. Continue to cook the steak to your desired level of doneness.
Chicken
  1. Heat veggie oil in pan at a medium heat
  2. Add in chicken and all remaining ingredients.
  3. Continue to cook the chicken until completely done.
  4. Saute to avoid burning.
Shrimp
  1. Heat oil in skillet or wok
  2. Add in shrimp
  3. Add the butter, soy sauce, and teriyaki.
  4. Saute until shrimp are cooked.
  5. Be careful not to overcook.
  6. Add a squeeze of lemon juice.
Garlic Butter
  1. Place all ingredients into a food processor. (You can also stir it by hand in a bowl.)
  2. Blend well.
  3. Spoon butter in between plastic wrap and mold into desired shape. Or store in a tightly sealed container.
  4. Refrigerate until firm.
Notes
  1. **Please use the vegetable oil as needed! I provide measurements in case you're cooking each component separately. If you are using the same griddle, skillet, etc., you may not need to add oil with the addition of each meal component. Use only as needed.
  2. When seasoning with salt to taste, keep in mind that you'll be using soy sauce as well. Soy sauce will add sodium too.
  3. I used a cast iron griddle for this meal to cook a couple components at once. However, a skillet, wok, and pan maybe used as well. Use what you have.
  4. If you make your own Garlic Butter, it will last for up to one week in the refrigerator. Store tightly in plastic wrap or a sealed container.
Coop Can Cook https://coopcancook.com/

Slow Cooker Steak Fajitas

I’ve been craving steak! Very seasoned, juicy steak. Oh, and something simple, of course. Therefore, in honor of Taco Tuesday, I’m making steak fajitas. And, since we’re still observing Slow Cooking month, I’m doing it in my crockpot. Very, very easy, Cookies. You can even use store bought fajita meat and seasoning if you’d like. But, why would you when mine is better? Come on, nah!

See, EASY and flavor PACKED!!! Pile on your favorite toppings! Then serve with with soft, warm tortillas, or ditch the bread and put it all in a bowl like I do! Slow Cooking month is almost over! Send me your recipe requests!!

Love,

B. Coop

Slow Cooker Steak Fajitas
Serves 6
Write a review
Print
Ingredients
  1. 2 lb thinly sliced flank or skirt steak
  2. 1 sliced onion
  3. 3 sliced bell peppers
  4. 2 minced garlic cloves
  5. 1/4 cup Worcestershire sauce
  6. 8 ounces of salsa
  7. 1/2 a lime
Fajita seasoning
  1. 1/2 tsp chili powder
  2. 1 tsp onion powder
  3. 1 tsp cumin
  4. 1/2 tsp paprika
  5. 1 tsp brown sugar
  6. 2 tsp salt
  7. 1/2 tsp crushed red pepper flakes
  8. 1/2 tsp cayenne pepper
Instructions
  1. Toss steak in Worcestershire sauce, garlic, and 1/2 fajitas seasoning
  2. Add half veggie mixture to the bottom of slow cooker
  3. Pour in the salsa
  4. Add in the steak and top with the remaining veggies and seasoning
  5. Squeeze in lime juice
  6. Cover and cook on LOW for 6-7 HRS or on HIGH for 3 HRS
  7. Serve with warm tortillas and your favorite toppings
  8. Enjoy!
Coop Can Cook https://coopcancook.com/

Chicken, Steak, and Veggies- Fajitas

Your girl has been on a roll, Cookies! I’ve cooked everyday this week! Proud of me? Don’t be. I’m ending this madness today! lol But, I’m sharing Wednesday’s dinner with you. I made Chicken and Steak Fajitas.fajitas4 
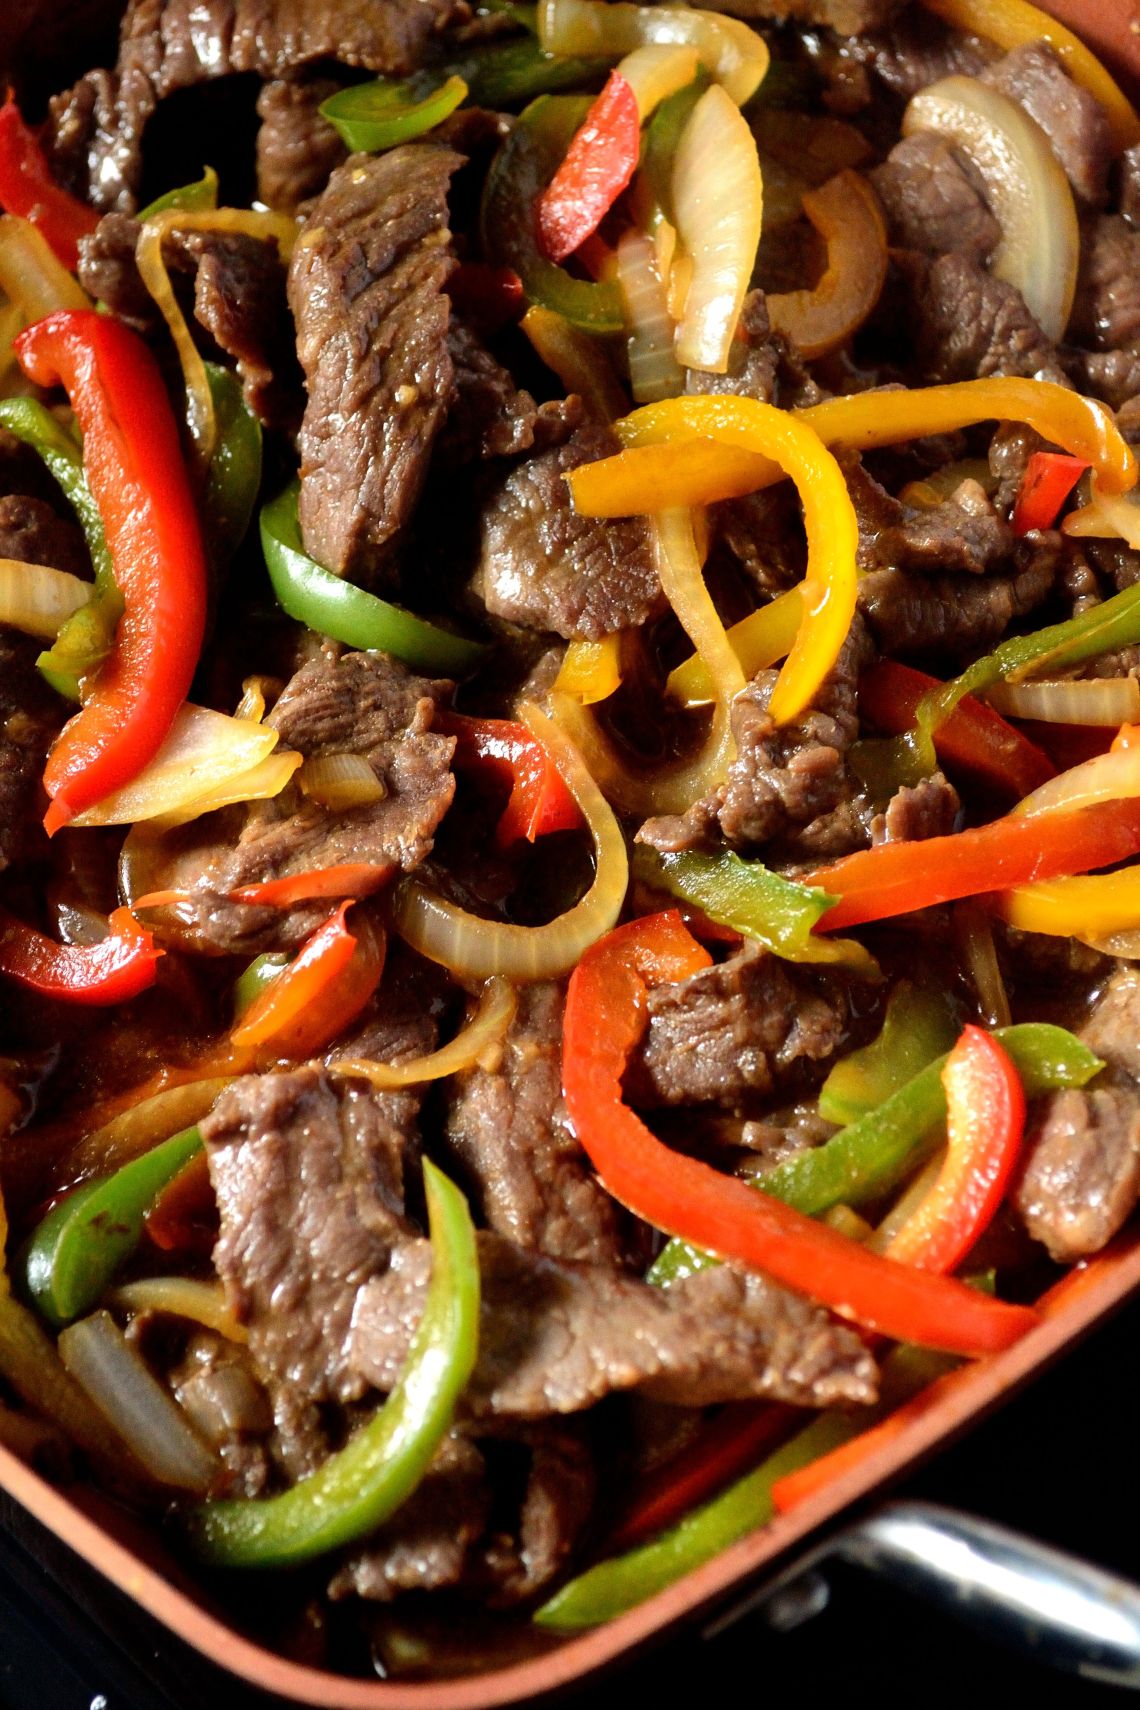
But, I ended up ditching the tortillas. And, omgoodness! It was so good! It was kinda like a burrito bowl minus the rice. Delish! And then I realized how good the meat and veggies were by themselves. You could just serve them with rice and boom!! Another easy, yummy dinner! Healthy too. So, I’m just going to share how I prepared the meat and vegetables and let you decide. Tell me how you’d like to serve it in the comments!

Love,

B. Coop

peppers and onions

fajitas2


Chicken. Steak, and Veggies (Fajitas)
Serves 4
Write a review
Print
Prep Time
2 hr
Cook Time
20 min
Prep Time
2 hr
Cook Time
20 min
Ingredients
  1. 1 1/2 lbs flank steak
  2. 1 lb boneless, skinless chicken breast
  3. 1/2 of each red, green, and orange peppers (sliced)
  4. 1 onion (sliced)
  5. 1/3 cup Worcestershire Sauce
  6. 1 tablespoon Garlic & Herb Mrs. Dash
  7. 1 tablespoon Onion powder
  8. 1 teaspoon cumin
  9. 1 teaspoon chili powder
  10. 2 tablespoons Tony's
  11. 3 Tablespoons of coconut or olive oil (add 1 tablespoon at a time)
Instructions
  1. Season steak and chicken with all spices and Worcestershire sauce
  2. Refrigerate for at least 2 hours
  3. Heat 1 tablespoon of oil in a skillet
  4. Add chicken and cook until done
  5. Remove chicken, add steak (add more oil if needed)
  6. Cook steak to desired temp and remove
  7. Add veggies
  8. Sprinkle the veggies with a pinch of salt to help release the water in them
  9. Cover, and cook until tender
  10. Add the meat back in and saute for about 2-3 mins
  11. Enjoy!
Notes
  1. Serve with tortillas and toppings as fajitas, make a burrito bowl, or just serve with rice.
Coop Can Cook https://coopcancook.com/