The BEST Fudgy Brownies Recipe EVER!

My Darling Cookies, I have worked tirelessly to create the BEST brownies in this life. Of course I’m biased! So, you’re just going to have to make them for yourself to see that I am NOT lying! I had to go back to every thing I learned in my Science classes in high school to develop this recipe. I wanted the perfect amount of every ingredient to make chewy and fudgy brownies that aren’t too sweet and have those nice crackly, shiny tops. The Good Lord came through as usual! This recipe is the ONLY brownie recipe you’ll need from here on out.

Brownie recipes tend to be so complicated. I tried to make this one painless. I even used inexpensive chocolate. A giant Hersey bar! Can’t go wrong with a classic. If you can’t find a huge 8 oz bar, just use two 4.4 oz bars. Or, go with your favorite chocolate. Chocolate chips will work as well.

I use granulated sugar as well as dark brown sugar. I chose dark brown sugar, because of the depth of flavor. There’s more molasses in dark brown sugar than light brown. But, it will still work if you don’t want to make another store run.

The key to achieving ooey gooey fudgy brownies with the perfect chewiness is to beat the hell out of the eggs and sugar! I mean, whip it good! You’ll know you’ve whipped it enough when the batter thickens slightly. Do a good stretch before grabbing the whisk!

I’m a self-rising flour kind of gal. But, not for this recipe. We need all purpose flour, because we don’t want cake like brownies. Self rising flour contains baking powder which works for cake brownies, but not chewy brownies. All the lift we need will come from the eggs and the amount of air we incorporate into the batter by whisking it vigorously with the sugars.

DO NOT OVER MIX THIS BATTER! Once you sift in the flour and cocoa powder, just fold it into the mix with a spatula. Ditch the whisk! We don’t want to over work the batter and stiffen the brownies.

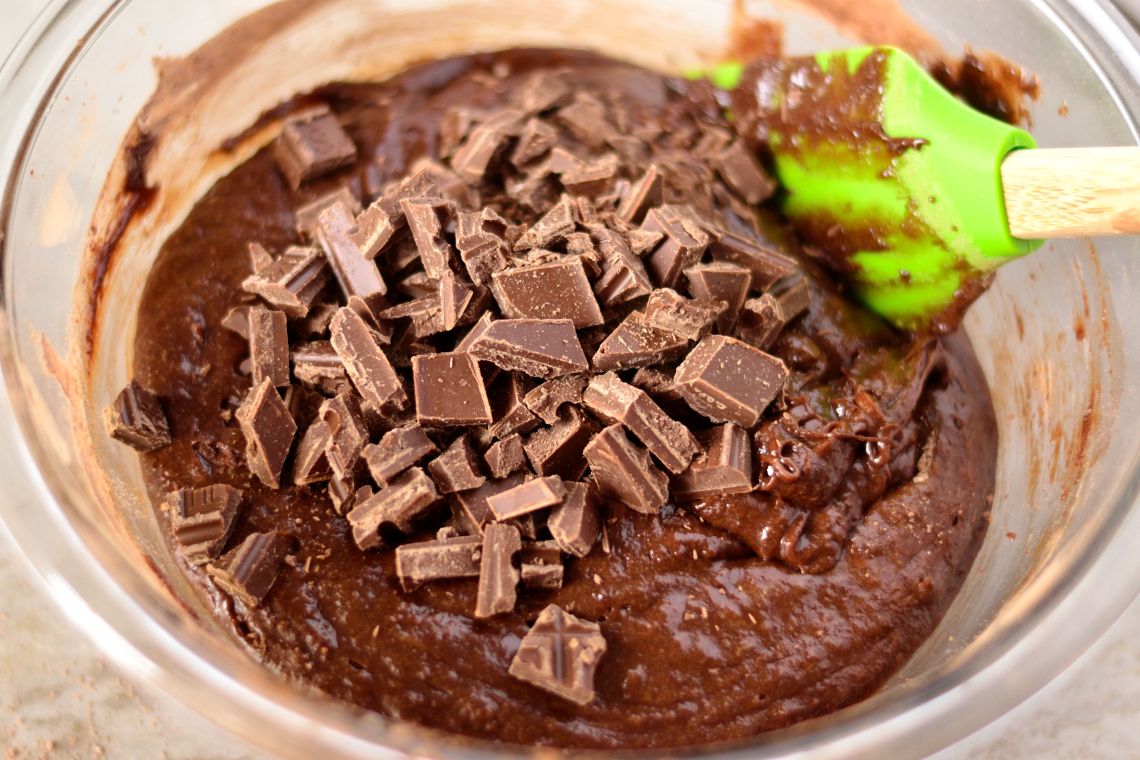
Here’s where we secure those chocolaty pockets of goodness. Fold in those chopped up chocolates. When our brownies bakes, the chocolate will melt making your first bite of these brownies pure heaven!
After baking the brownies will jiggle ever so slightly in the middle when you shake the pan. The edges will have set and you’ll know they are ready to go. Just allow them to cool in the pan for 20 minutes before removing and slicing. Rinse your knife in hot water and pat dry in between cuts to make clean slices. Enjoy!

Happy Baking,

B. Coop

The BEST Fudgy Brownies Recipe Ever!

Servings 9 pieces

Ingredients

  • 1 1/2 sticks unsalted butter melted
  • 8 ounces good quality chocolate chopped
  • 3/4 cup granulated sugar
  • 1/3 cup dark brown sugar packed
  • 2 eggs
  • 1 TBS pure vanilla extract
  • 3/4 cup all purpose flour
  • 1/3 cup unsweetened cocoa powder
  • 1/2 tsp salt

Instructions

  1. Preheat oven to 350 F
  2. Spray an 9×9 baking pan with non-stick cooking spray and line it with parchment paper
  3. Place 4 oz of the chocolate in a small bowl
  4. Melt the butter in the microwave and pour it over the chocolate
  5. Stir until the chocolate melts; set aside to cool
  6. In a mixing bowl combine the sugars, eggs, vanilla extract and salt; whisk vigorously for 2-3 mins
  7. Whisk in the chocolate/butter mixture
  8. Sift in the flour and cocoa powder
  9. Fold it in just until combined; don’t over mix
  10. Fold in the rest of the chopped chocolate
  11. Pour the mixture into the baking pan and spread it out evenly
  12. Bake for 30-35 minutes
  13. Allow the brownies to cool for 20 mins before cutting
  14. Enjoy!

Recipe Notes

*I use a large chocolate bar. Chocolate chips are fine as well.

Pie Crust

Cookies, we’re going back to the basics today. I always tell you guys I’m going to do a basics series. Then, I do one recipe, get side tracked, and move on to something else. You have got to start helping me stay focused! lol There are gonna be many pie recipes in our future together, so we’re gonna be a pretty amazing pie crust recipe in our arsenal!

First things first, we need COLD ingredients! I mean everything should be cold. Even the flour. Why? Because, we don’t want the butter to start to melt anywhere, but in the oven. So, we need to keep everything nice and cold during the preparation process. I keep a few sticks of butter in my freezer for this reason. But, if you’re a normal person, just give your butter an hour or so in the freezer before you start. I like to chill my flour and lard (or shortening) in the fridge for an hour beforehand as well. And as for the water, I fill a measuring cup with more water than I’ll need and drop some ice cubes in the there to keep it chilled. 

You can either use all butter or a mix of half butter, half lard or shortening. For a flakier pie crust, use half butter and half shortening. But, it will still come out with a nice texture if you just use butter. Totally up to you. 

Oh! If you have a food processor, grab it now! It’s the easiest, and least messy, way to make this crust. That’s just my opinion. However, this can definitely be done using a bowl and a pastry cutter. Or two knives. Whichever of the two you have available. Just be careful not to touch the ingredients too much or take too much time preparing the dough. I’m not trying to rush you and make you all nervous about this. It’s just pie crust, chile! But, we don’t want to melt that butter. So, move like you got somewhere to go, okay?

My recipe will yield (2) 9 inch pie crusts. After we have the dough prepared, separated, and rounded, we MUST refrigerate it for at least one hour. This will give the gluten time to chill out and ease. At all, it’s had a rough day in the processor. Now, you can also freeze these things. Just wrap them, individually, in plastic wrap. Throw em in a freezer bag and pop it in the freezer. When you’re ready to use, let them sit out at room temperature just until they are soft enough to roll out. Don’t thaw them all the way out. Use within 1 month, though. 

Happy Baking,

B. Coop

Pie Crust
Yields 2
Write a review
Print
Prep Time
10 min
Prep Time
10 min
Ingredients
  1. 2 cups all purpose flour
  2. 1 stick, unsalted butter
  3. 1/2 cup shortening or lard (Crisco. Butter or Regular flavor, Original flavor, or whatever it's called)
  4. 1 tsp salt
  5. 2 tsp granulated sugar
  6. 4 to 8 tablespoons of cold water (Don't panic. I'll explain below...)
Instructions
  1. Place flour, salt, and sugar into a food processor or bowl
  2. If using a food processor, pulse 1-2 times to mix. Use a whisk if you're using a bowl
  3. Cut cold butter and shortening into small cubes.
  4. Add it all to the flour mix
  5. Pulse (or use a pastry cutter in the bowl) until the mixture is crumbly
  6. Now, add in the cold water 2 tablespoons at a time until the dough clumps when pinched together.
  7. Then, pour the dough onto your clean work space and mold it into a ball
  8. Cut the dough into two equal parts and form a round, thick disc with each part.
  9. Wrap each crust in plastic wrap and refrigerate for at least 1 hour before using.
  10. To freeze, place each wrapped crust into a freezer bag and seal.
Notes
  1. Crust will last up to 1 month if frozen correctly.
Coop Can Cook https://coopcancook.com/